I built my first attached pergola off the back of a client’s kitchen door, and I got exactly one thing wrong: flashing.
Three months later, there was a damp patch above her window, and I spent a Saturday pulling siding I had just put back to fix it.
A pergola attached to your house requires one of three attachment methods, a permit in most cities, and hardware compatible with your wall type.
Skip any of that, and you’re looking at rot, a failed inspection, or a structure that pulls away from the house in a storm.
Get it right, and you end up with a covered space that costs 10 to 20 percent less than a freestanding pergola.
Here’s every step I actually follow, the permit picture, real cost ranges, and the six mistakes I see most often.
What Is a Pergola Attached to a House?
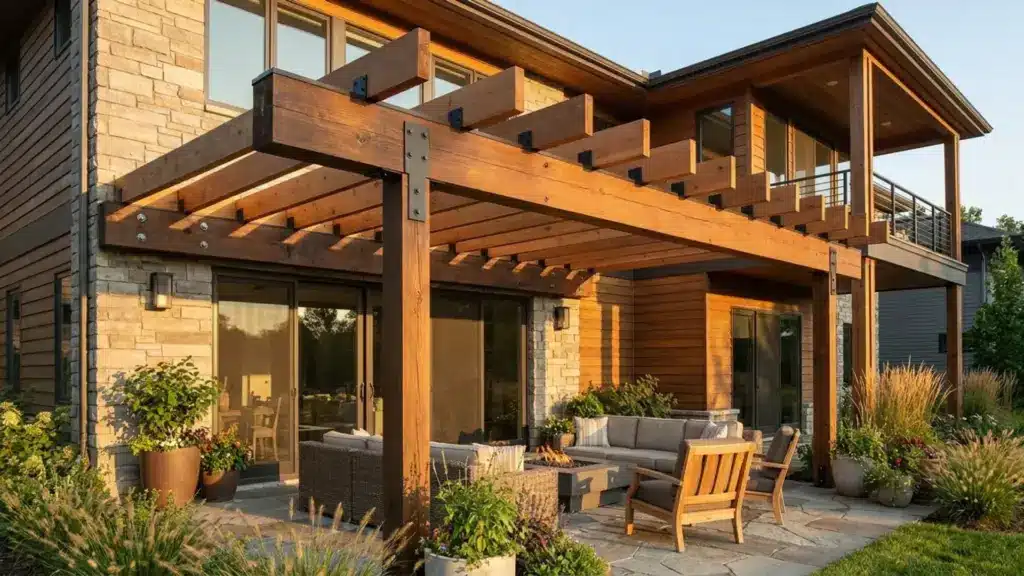
A pergola attached to a house connects directly to your home’s exterior wall on one side. Two posts support the outer edge. Your home carries the structural load on the other side.
A pergola attached to a house becomes a direct extension of your living space, and that connection is a big part of a pergola’s actual purpose in most backyards I work on.
You also spend less building it. Two posts and two footings need less material and labor than the four posts a freestanding pergola requires.
Key benefits at a glance:
- Only 2 support posts instead of 4
- Your home’s wall works as a natural windbreak
- Easy access to your home’s electrical system for lighting and fans
- A direct visual link between your indoor and outdoor space
3 Attachment Methods for a Pergola Attached to Your House
Before you buy anything, figure out which attachment method works best for your house. Three options exist, each suited to a different situation.
1. Ledger Board to Wall Framing
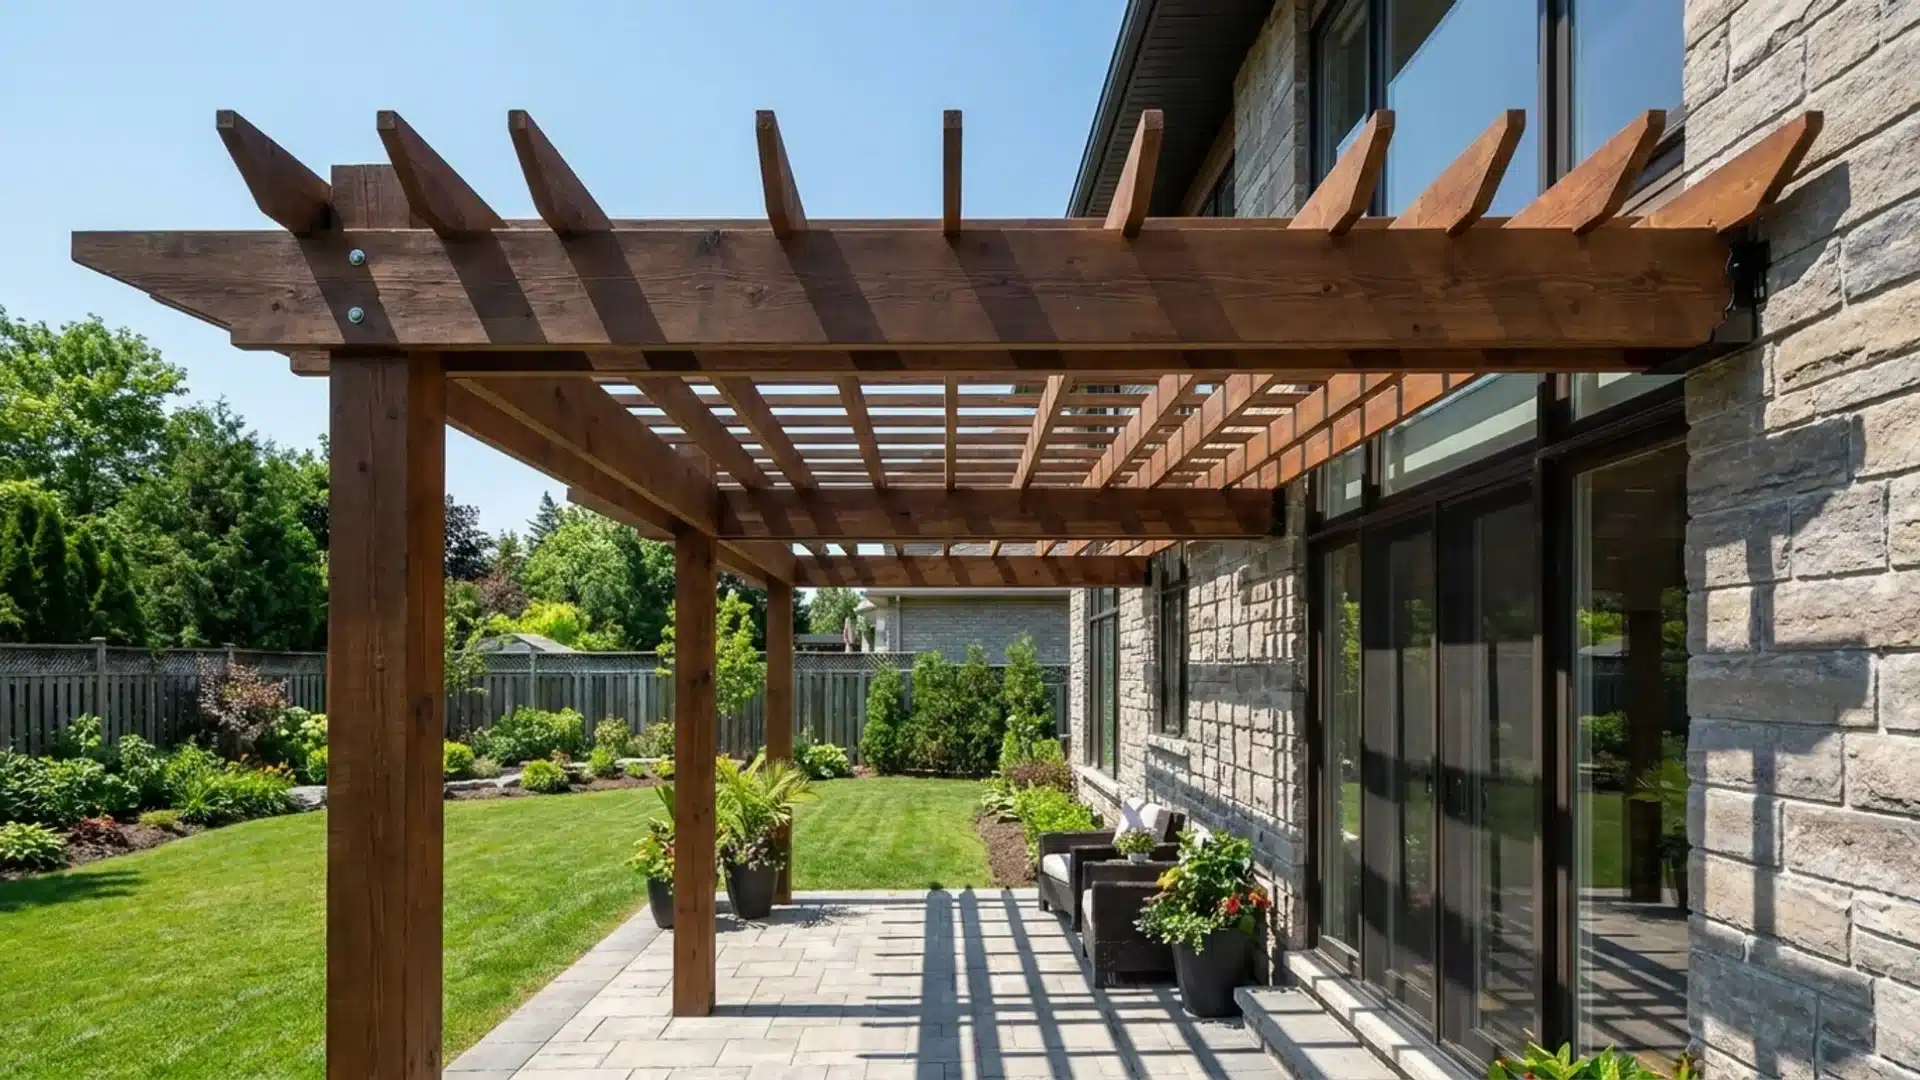
This is the method I use on most attached pergolas. You bolt a horizontal board directly into your home’s structural framing, either the rim joist or the wall studs behind the siding.
Never fasten into siding alone. Siding carries no load. The ledger has to hit solid framing every time.
Use stainless steel or hot-dipped galvanized lag bolts. They resist rust over time. Drill pilot holes first so the wood doesn’t split.
2. Fascia Board Mount
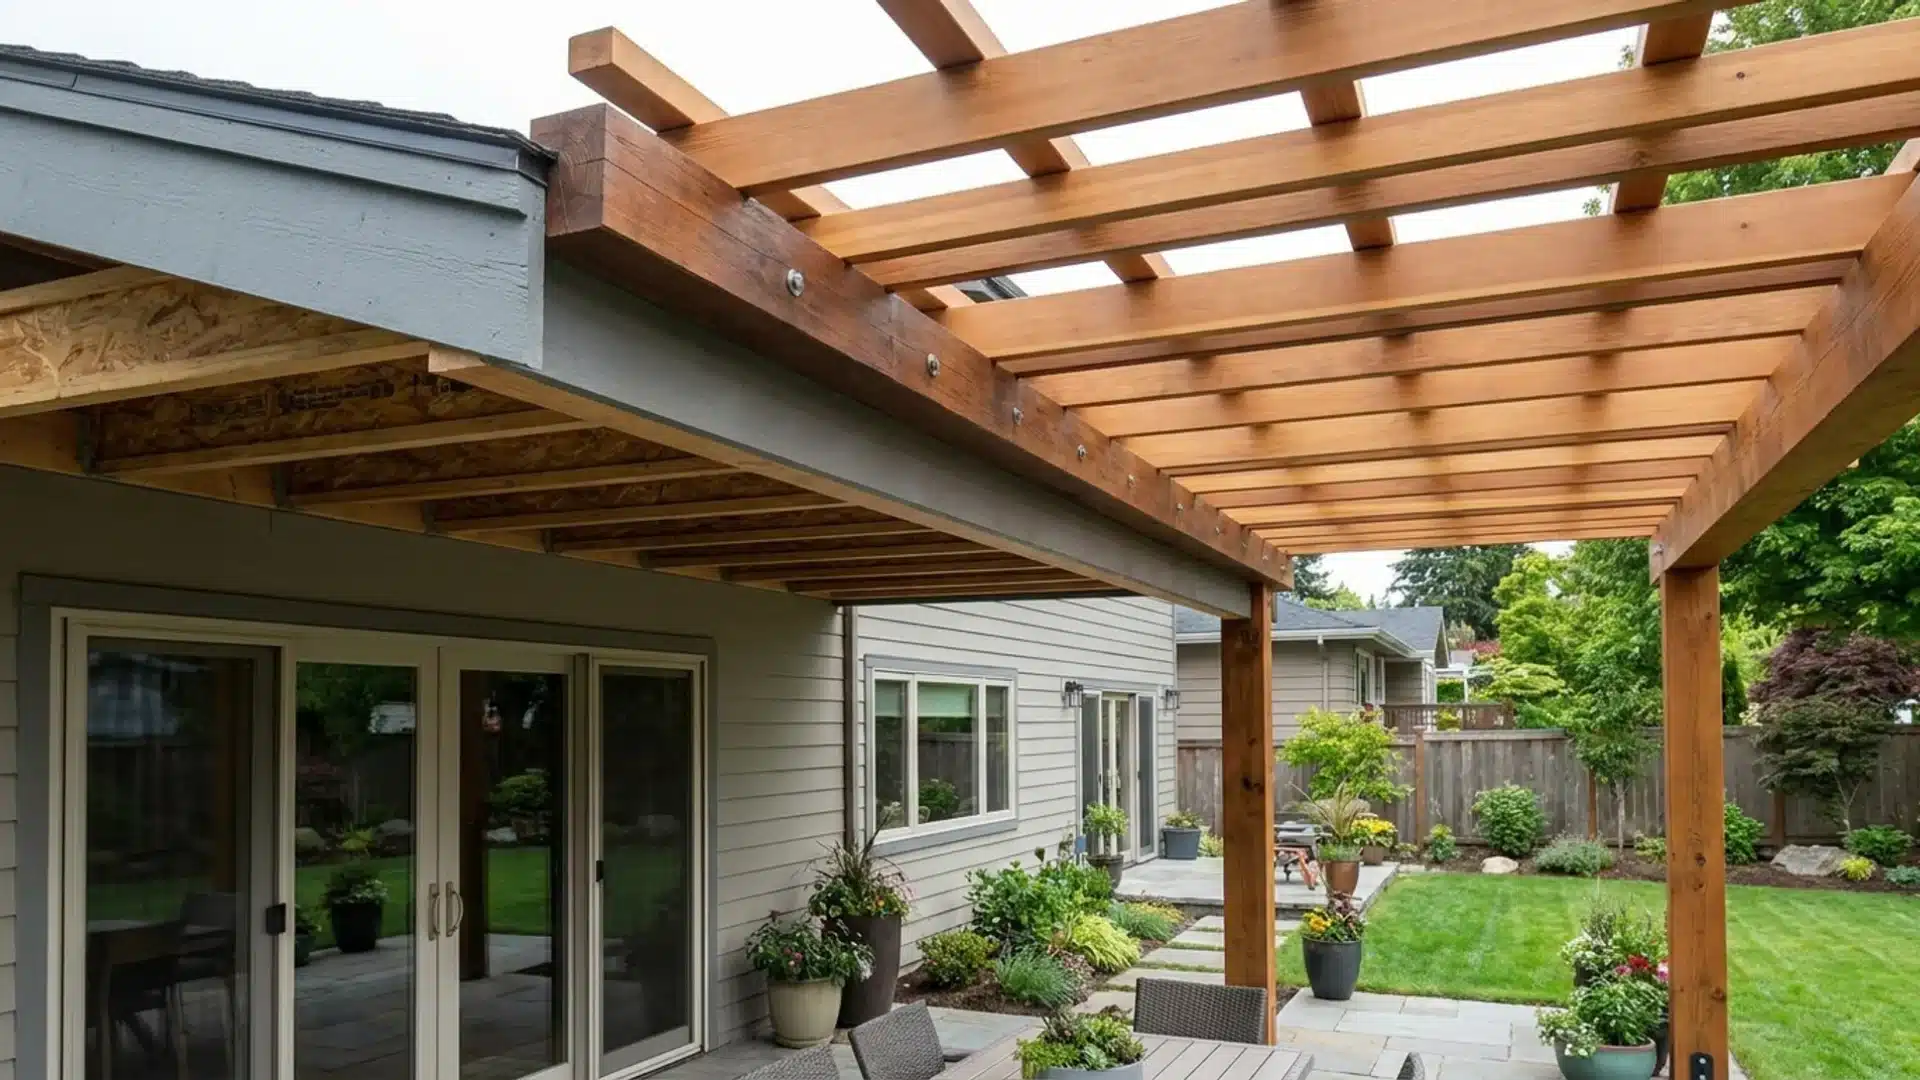
This method skips the wall entirely. Instead, you attach a second beam to the fascia board along your roofline.
It works well when windows or a door take up your wall space. But standard fascia boards aren’t built to carry structural loads.
You may need to swap in engineered lumber before mounting. Get a structural assessment first if you’re going this route.
3. Roof Raiser Brackets
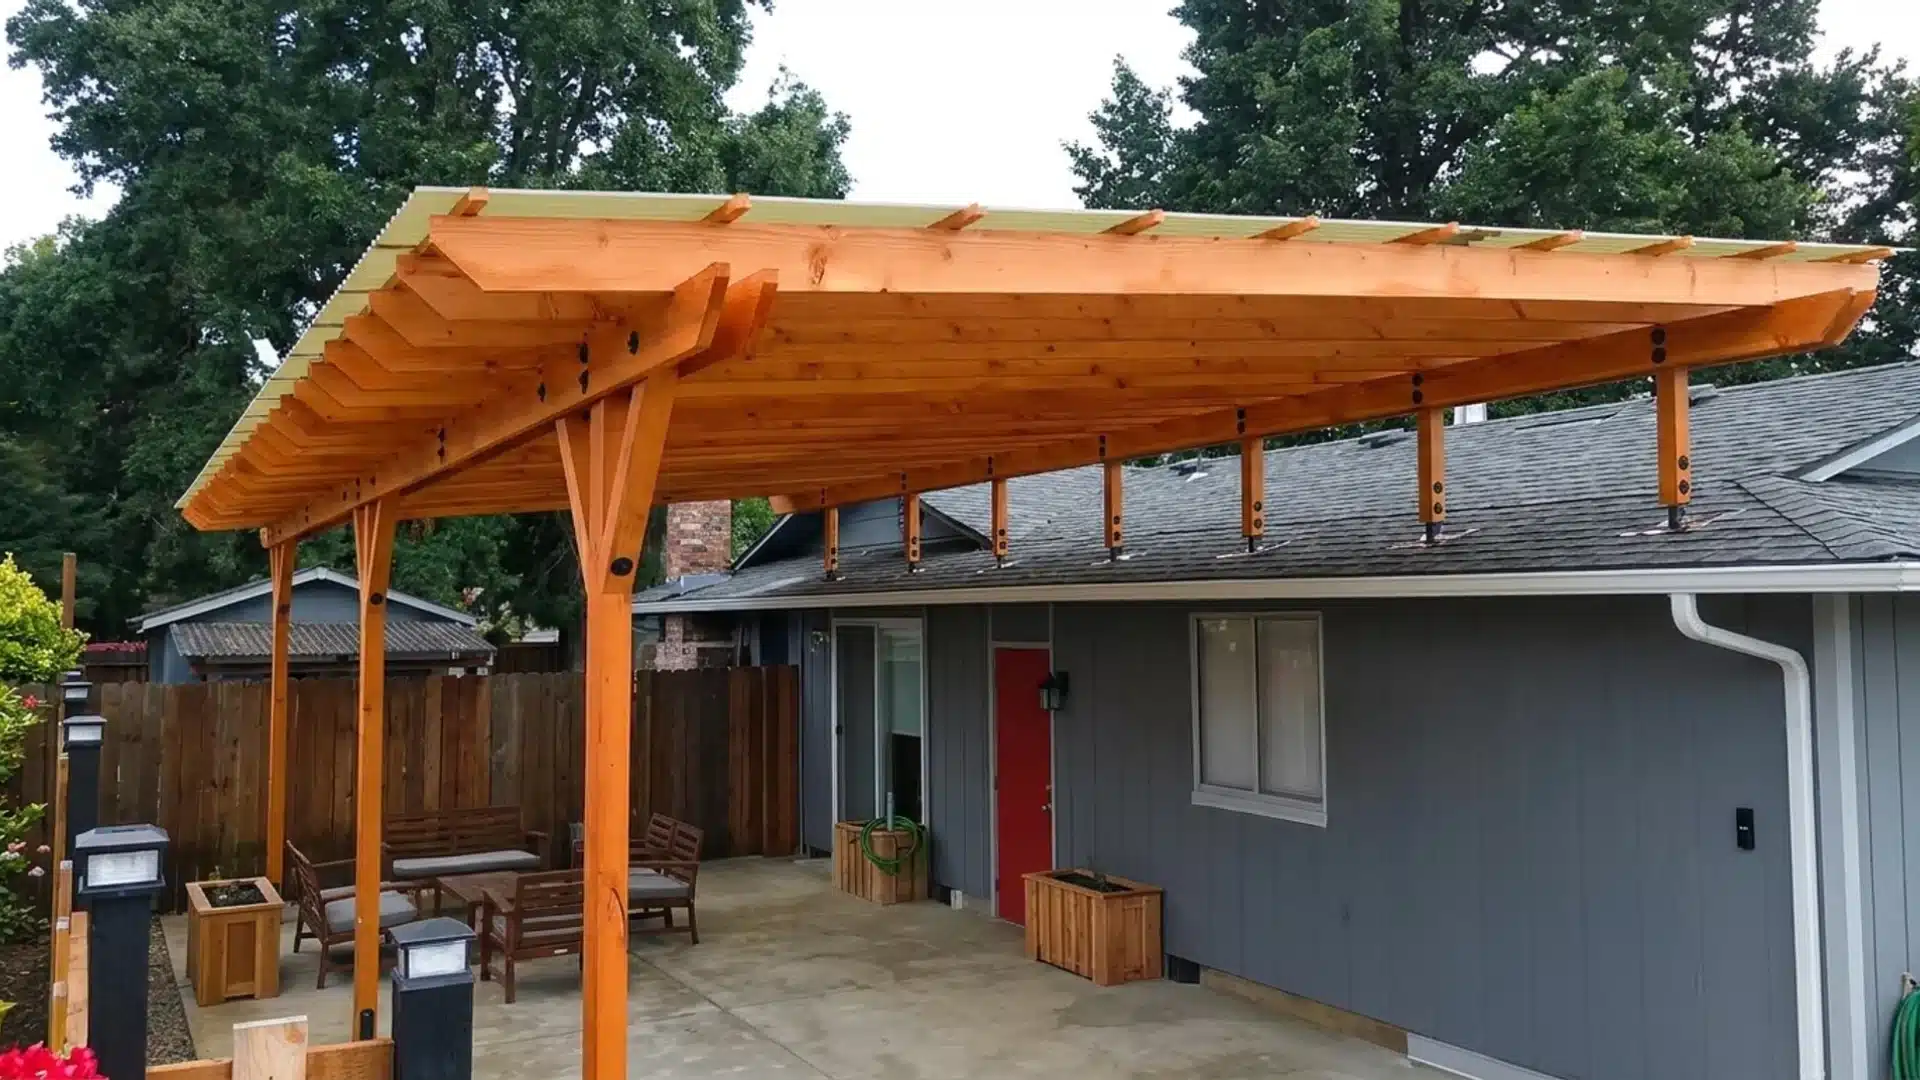
Roof raiser brackets mount onto your roof surface. Short posts sit on those brackets above the roofline, which gives the pergola a floating look.
Use this method when your eave line sits too low for a wall mount or fascia mount to give you enough headroom.
This one needs careful waterproofing around every bracket penetration. Your roof structure also has to be strong enough to carry the added load.
How to Attach a Pergola to Your House: Step by Step

Get the order wrong here and the structure fights you later. This is the sequence I follow on every job.
Step 1: Plan Your Layout
Mark where the pergola will sit using stakes and string. Check for windows, doors, and utility lines in the area first.
Whether you’re building over a porch or a patio changes where your posts land, so measure that surface before you mark anything else.
A standard attached pergola sits at least 9 feet tall. Use a level to mark two vertical lines from the soffit down to the surface below.
Measure the diagonal between corners. Both measurements should match. If they don’t, your frame will sit crooked.
Step 2: Find the Wall Framing
Use a stud finder to locate wall studs or the rim joist behind the siding. Mark each one clearly with painter’s tape.
For brick walls, know this going in: brick veneer is decorative. It carries no structural load. Your ledger has to anchor through the brick and into the framing or rim joist behind it.
Step 3: Install the Ledger Board
Hold the ledger board against the wall at your marked height. Get a second person to help. Check that it’s perfectly level before you drill anything. A half-inch tilt at the ledger results in visible misalignment across every rafter.
Add shims or spacers between the ledger and the wall. That gap keeps moisture from getting trapped behind the board.
Fasten with lag bolts through each stud or rim joist location, and tighten fully with a ratchet.
Step 4: Install Flashing
Flashing is the step most DIY builds skip, and it’s the one that causes the most damage. I learned that the hard way, and I don’t skip it anymore.
Cut away the siding at the ledger location to expose the sheathing behind it. Install Z-flashing, either galvanized steel or aluminum, above the top edge of the ledger.
Tuck it under the siding course above so that water runs over the ledger face rather than behind it.
Add a self-adhesive waterproof membrane directly behind the ledger board for extra protection. Skip this step, and you’re looking at rot, mold, and repair costs that can run higher than the pergola itself.
Step 5: Set the Post Footings
Dig post holes at your marked locations. Most areas require a minimum depth of 24 inches. In frost zones, go 36 to 42 inches deep.
Place a solid concrete block at the bottom of each hole, then pour concrete around embedded post anchors. Let it fully cure before you set the posts. If you’re starting from bare dirt rather than an existing slab, it’s worth deciding now whether laying a paver patio first makes more sense than pouring individual footings into soil.
For a pergola attached to a house, you only need two outer posts. Your home’s wall carries the load on the inside edge.
Step 6: Connect the Beams and Rafters
Attach support beams from the ledger to the outer posts using joist hangers. Check that all beams sit level before final fastening.
Run rafters perpendicular to the house wall, spaced evenly. Use metal joist hangers at every ledger connection, and use stainless steel fasteners throughout.
Attaching a Pergola to Different Wall Types
Not every house is built the same way, and the wall material behind your siding changes how you mount the ledger.
1. Wood-Frame Walls: The most straightforward wall type. Remove a section of siding, expose the sheathing, and fasten the ledger directly into studs with lag bolts.
2. Brick Walls: Never drill into mortar joints. Use a hammer drill with a masonry bit. For solid brick, sleeve anchors or chemical epoxy anchors work well.
Clean every hole with a wire brush and compressed air before setting epoxy anchors. That step is what gives you a solid bond, not just the anchor itself.
3. Stucco Walls: Cut the stucco cleanly with a circular saw fitted with a masonry blade, and seal all cut edges after installation. Water gets into unsealed stucco cuts quickly, which causes problems inside the wall cavity.
I frame most of my own jobs, but I hand masonry work to a mason I trust. Getting anchors wrong in brick or block is expensive to fix once, and worse to fix twice.
Do You Need a Permit for a Pergola Attached to Your House?
Yes, in most cases. Many municipalities treat a pergola attached to a house as a home addition, and that classification triggers permit requirements.
Most areas require a permit when the structure:
- Attaches directly to the home
- Exceeds 120 to 200 square feet
- Stands taller than 8 to 12 feet
- Includes electrical components like lighting or fans
Permit fees typically run from $50 to $300 depending on your location and project scope. If you live in an HOA, its approval process runs separately from the city permit process, and you may need both before you start work.
Building without a permit risks fines, a forced teardown, and complications when you go to sell the house.
When you file, use the word “pergola.” Calling it a “roof” or “room addition” can trigger a stricter code review and slow down your approval.
How Much Does a Pergola Attached to a House Cost?
Attached pergola installations cost less than freestanding builds. Fewer posts and fewer footings lower both material and labor costs.
Here is a general cost range:
- Basic DIY wood kits: $1,500 and up
- Budget aluminum installed: $4,000 to $10,000
- Mid-range wood or aluminum installed: $10,000 to $20,000
- Premium motorized louvered pergola installed: $18,000 to $30,000+
- Permit fees: $50 to $300+
Costs vary by region, structure size, and the materials you pick. A lot of my clients budget separately for a gravel fire feature nearby once the pergola itself is done, since it stretches the outdoor season into fall.
Common Mistakes to Avoid When Building a Pergola
These are the errors that show up most often on attached pergola projects:
1. Bolting into siding only: Siding carries no structural load. Always hit solid framing.
2. Skipping flashing: Water damage behind the ledger is the most expensive mistake you can make.
3. Not checking the eave depth: A standard bracket won’t work if your overhang is too deep.
4. Using untreated wood: Untreated pine warps, rots, and attracts insects within a few years.
5. Getting the ledger out of level: Even a small error here shows across every rafter.
6. Placing posts too close to the property line: Check setback rules before you mark a single post location. I tell every client to work out their full garden layout before pouring a single footing, since a pergola placed in isolation rarely fits the yard as well as one planned alongside everything else.
Should You DIY or Hire a Professional?
A pergola attached to a house is a manageable DIY project if you have solid carpentry experience and at least two helpers. The ledger board, flashing, and footings are all doable with the right tools.
Call a professional if your walls are brick, stucco, or masonry. Mistakes on masonry walls are expensive and hard to undo.
You should also hire out if your home has a low eave line, you’re in a frost zone, or you’ve never worked with structural lag bolts and joist hangers before.
Pergola kits make the DIY path easier. Many include pre-cut materials, installation hardware, and engineer-stamped drawings you can submit directly for permit approval.
The Bottom Line
A pergola attached to the house gives you covered outdoor space and a direct line from indoors to outdoors, for less than the cost of a freestanding build.
Three things decide whether it lasts: a level ledger, real flashing, and footings set to the right depth. Get those three right, and the rest is straightforward.
Check your local permit rules before you start, and measure your roof overhang before you order materials.
What wall type are you attaching to? Drop it in the comments. It might save the next person a Saturday like the one I had.
Frequently Asked Questions
Is it okay to attach a pergola to a house?
Yes. It’s common and structurally sound if you anchor into real framing, flash the ledger properly, and pull whatever permit your city requires.
How long does an attached pergola last?
A pressure-treated pine pergola usually lasts 10 to 15 years with regular sealing. Cedar and redwood resist rot naturally and can last 15 to 25 years.
What’s better, a pergola or a gazebo?
It depends on how you’ll use the space. Pergolas suit open, sunny dining areas. Gazebos suit fully enclosed, permanent structures you can close up completely.