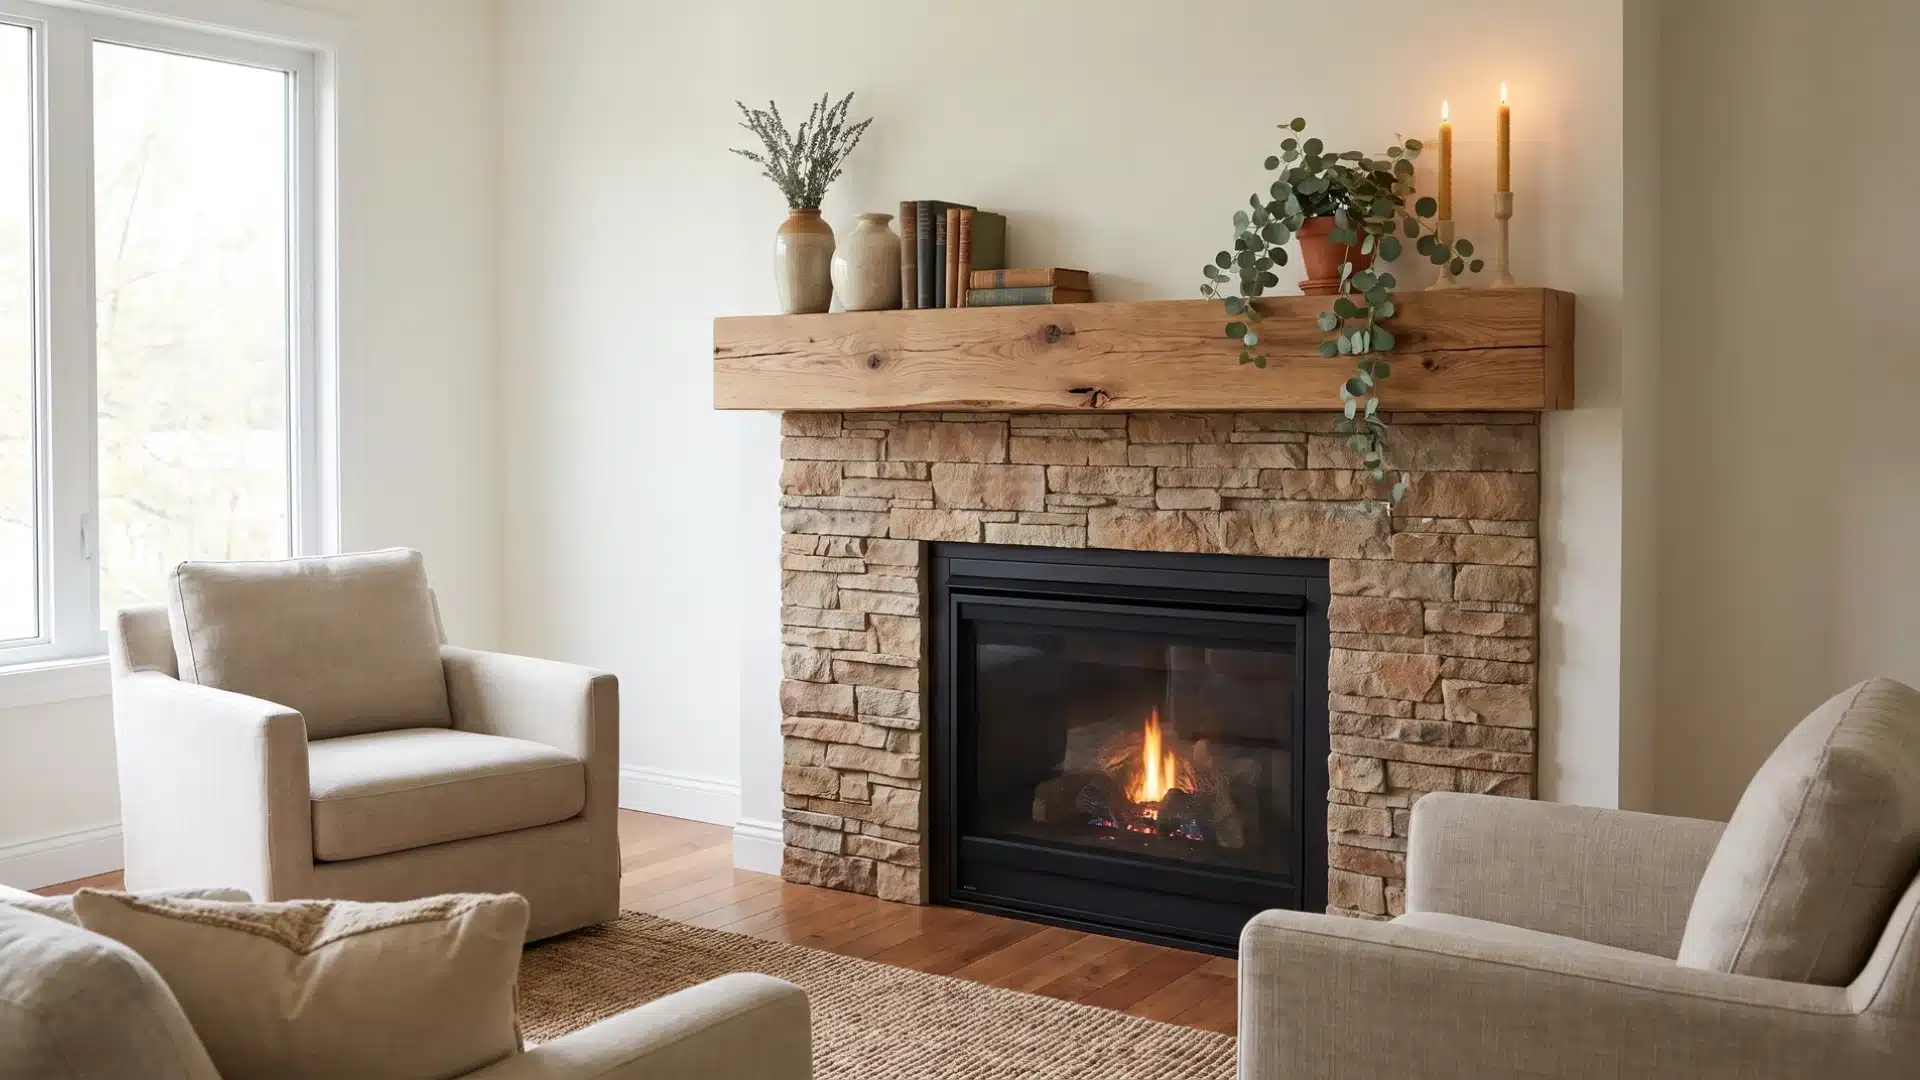
Do you want to give your living room a new focal point without spending a fortune? A DIY fireplace mantel is one of the easiest ways to do it.
You do not need years of woodworking experience. You need the right plan, the right tools, and a bit of patience.
In this post, I will walk you through every step, from picking your materials to installing the finished piece safely. You will also learn the fire code rules that most tutorials skip.
By the end, you will know exactly how to build a DIY fireplace mantel that looks great and stays safe for years.
Safety First: Fireplace Mantel Clearance Rules
Before you cut a single board, please make sure you understand fire safety clearance.
Building codes exist because heat from a fireplace can ignite nearby wood. Here are the basic rules used across most regions:
1. No combustible material within 6 inches of the firebox opening: This includes wood trim, shelving, or any flammable surface.
2. The 1/8 inch rule: For material placed between 6 and 12 inches from the opening, it cannot stick out more than 1/8 inch for every 1 inch of distance from the firebox.
3. 12 inches above the opening is the common minimum height for a wood mantel shelf: Some local codes require more, so always check first.
4. Side trim follows the same math: If your side trim projects more than 1.5 inches from the fireplace face, you need extra clearance to match that projection.
5. Non-combustible materials like stone, tile, or metal can sit closer to the firebox than wood can. If you want a mantel closer to the opening, consider these materials instead.
Every region has its own building code, and manufactured fireplace inserts often come with their own listed clearance instructions.
Always check your local code office or the fireplace manufacturer’s manual before you finalize your design. Skipping this step is the single biggest risk in any fireplace mantel project.
Tools and Materials You Will Need
Here is what you should gather before you start:
Tools:
- Miter saw or circular saw
- Pocket hole jig
- Cordless drill
- Random orbital sander
- Clamps
- Tape measure and level
- Stud finder
Materials:
- Wood boards (pine, MDF, or reclaimed wood, depending on your budget)
- Wood glue
- Pocket hole screws
- Wood filler
- Sandpaper (80 grit and 150 grit)
- Paint, stain, or sealer
- Wall anchors or a 2×4 ledger board for mounting
You do not need every expensive tool on the market. A basic saw, drill, and sander can handle most mantel builds. If you plan to add crown molding or detailed trim, a few extra clamps will help.
How to Build a DIY Fireplace Mantel (Step-by-Step)
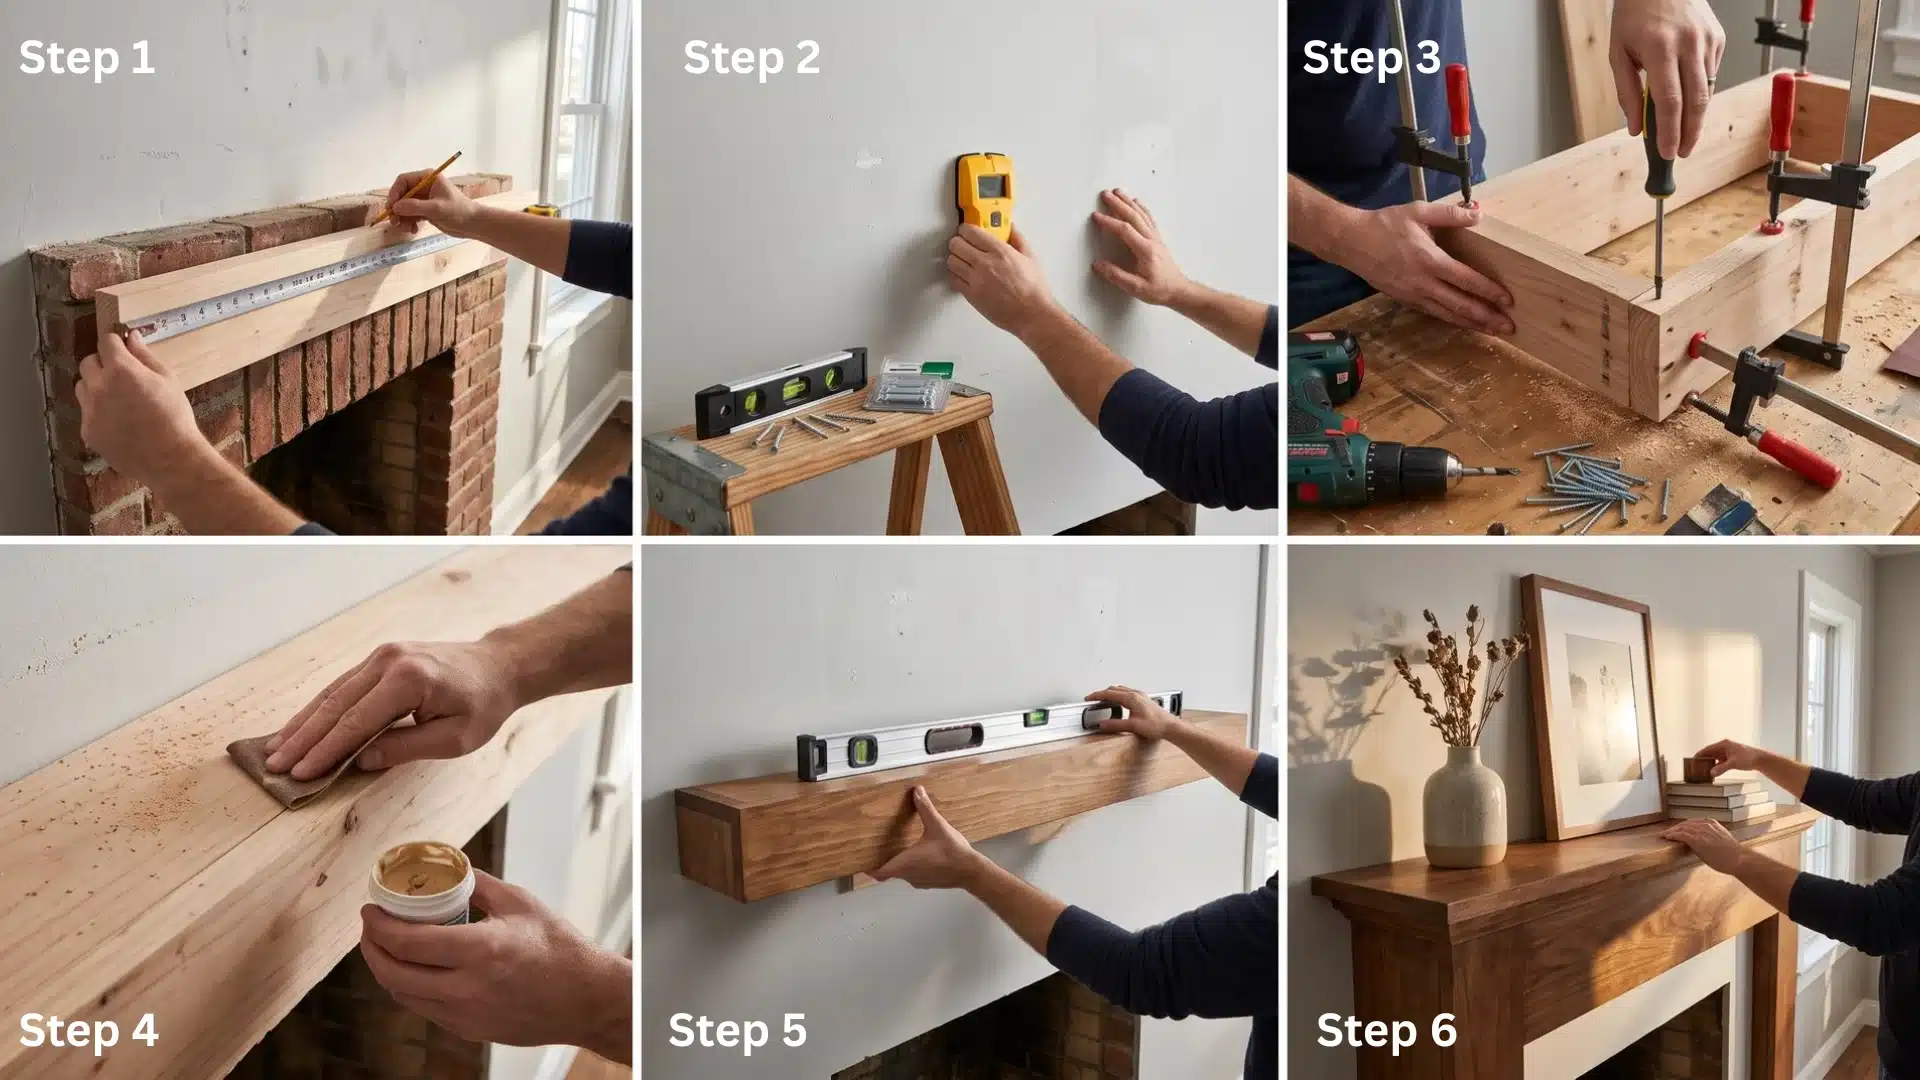
Ready to get your hands dirty? Follow these steps in order, and you will have a finished mantel that looks like it came from a custom shop.
Step 1: Measure and Plan Your Design
Start by measuring the width of your fireplace opening. Your mantel should extend a few inches beyond each side for a balanced look. Next, decide on the height. Remember the 12-inch minimum clearance rule from earlier.
Think about depth too. A deeper mantel shelf holds more decor, but it also needs more clearance from the firebox.
Sketch your design or find an inspiration photo before you cut any wood. This step saves you from costly mistakes later.
Step 2: Choose Your Mounting Method Based on Wall Type
Your wall type changes how you should mount the mantel. This is another detail that many tutorials gloss over.
- Stud walls: Use a stud finder to locate studs, then screw a ledger board directly into them for a strong hold.
- Brick or masonry walls: You will need masonry anchors or a hammer drill to secure your ledger board into the brick or stone.
- French cleat method: This involves attaching two angled boards, one to the wall and one to the back of the mantel, so the mantel hangs securely and can be removed later if needed.
- Leg-supported mantels: Instead of floating, some designs use vertical pillars or legs that rest on the floor or hearth for extra support.
Pick the method that matches your wall and the weight of your finished piece. Heavier wood, like a solid beam, usually needs a ledger board and studs rather than a simple floating bracket.
Step 3: Cut and Assemble the Frame
Once your measurements are set, cut your boards to size. If you are building a box-style mantel, you will need a front piece, two side pieces, a top, and a bottom.
Use pocket hole joinery to connect the pieces quickly and cleanly.
If you want mitered corners for a clean, finished look, cut your angles at 45 degrees on the miter saw and glue them together, holding everything in place with clamps while it dries so the corners line up cleanly.
Take your time here. A tight, square frame makes every later step easier.
Step 4: Sand, Fill, and Prep for Finish
After assembly, fill any nail holes or gaps with wood filler. Let it dry completely, then sand it flush with the surrounding wood.
Sand the entire mantel first with 80-grit sandpaper to remove rough spots, then follow with 150-grit for a smooth surface.
This two-step process gives you a clean base for paint or stain and helps the finish last longer.
Step 5: Install the Mantel Safely
Now it is time to mount your finished piece. Attach your ledger board to the wall studs or masonry anchors, following the clearance rules covered earlier. Use a level to make sure everything sits straight.
Slide or lower your mantel onto the ledger board, then secure it with screws through the back or top, depending on your design.
Double-check the clearance distance from the firebox one more time before you consider the job done.
Step 6: Finish and Style Your Mantel
You have a few options for the final look:
- Paint gives a clean, modern finish and works well with farmhouse or coastal styles.
- Stain highlights the wood grain and suits classic or rustic rooms.
- Natural sealed wood works if you used reclaimed or textured lumber and want to show its character.
Match your finish to the rest of your room. A white painted mantel pairs well with shiplap walls, while a stained wood mantel suits a room with exposed beams or brick.
Once the mantel is finished, think about what goes on top of it.
Candles, framed photos, and small greenery all work well, and a simple DIY plant hanger can add texture above the shelf without crowding the space below.
5 Types of DIY Fireplace Mantels to Choose From
Before you start cutting wood, pick a style that fits your room. Here are five popular options.
1. Floating Mantel
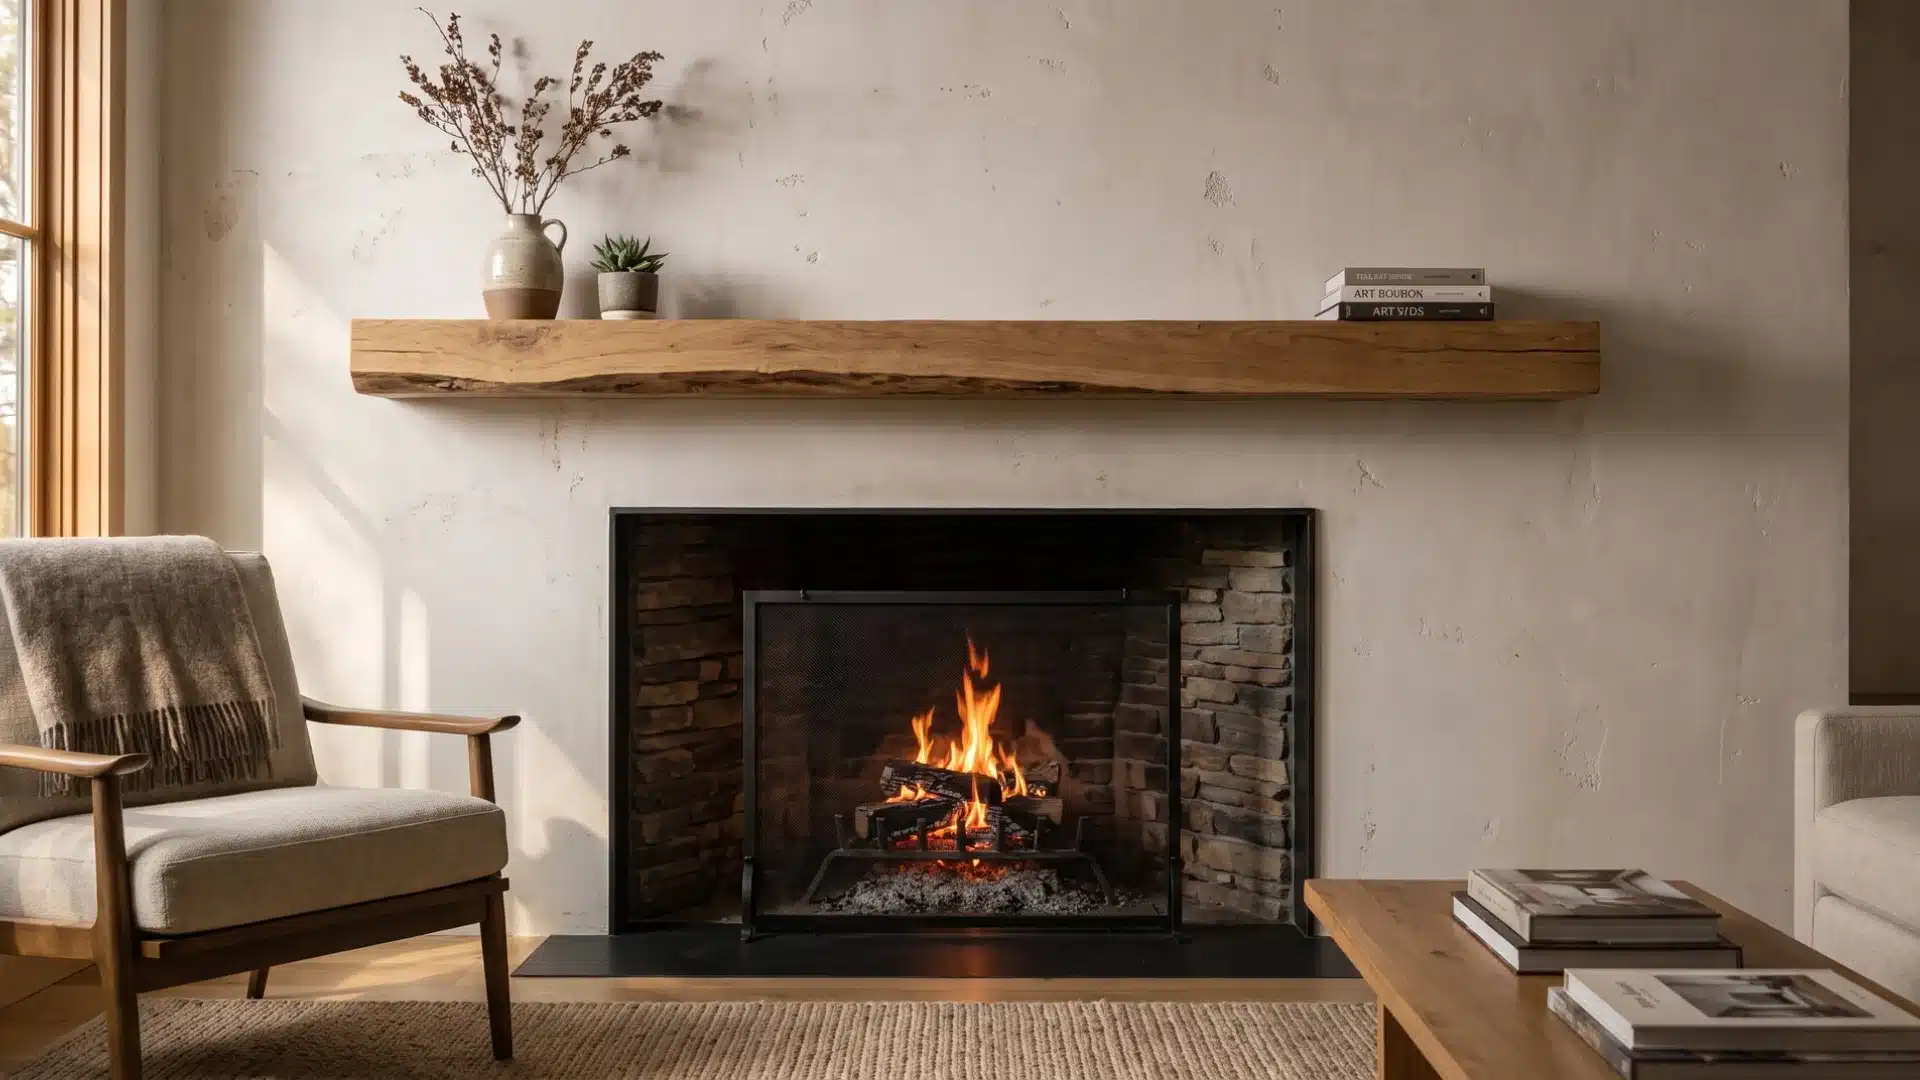
This style has no visible legs or supports. It mounts flush to the wall using a ledger board or French cleat, so it looks like it is hovering above the fireplace.
Floating mantels work well in modern or minimalist rooms where you want clean lines and no clutter underneath.
Since the entire weight rests on hidden hardware, you need strong studs or masonry anchors behind the wall.
This style is usually thinner and lighter than other designs, which makes it a good pick for smaller fireplaces or rooms with limited wall space above the opening.
2. Box Beam Mantel
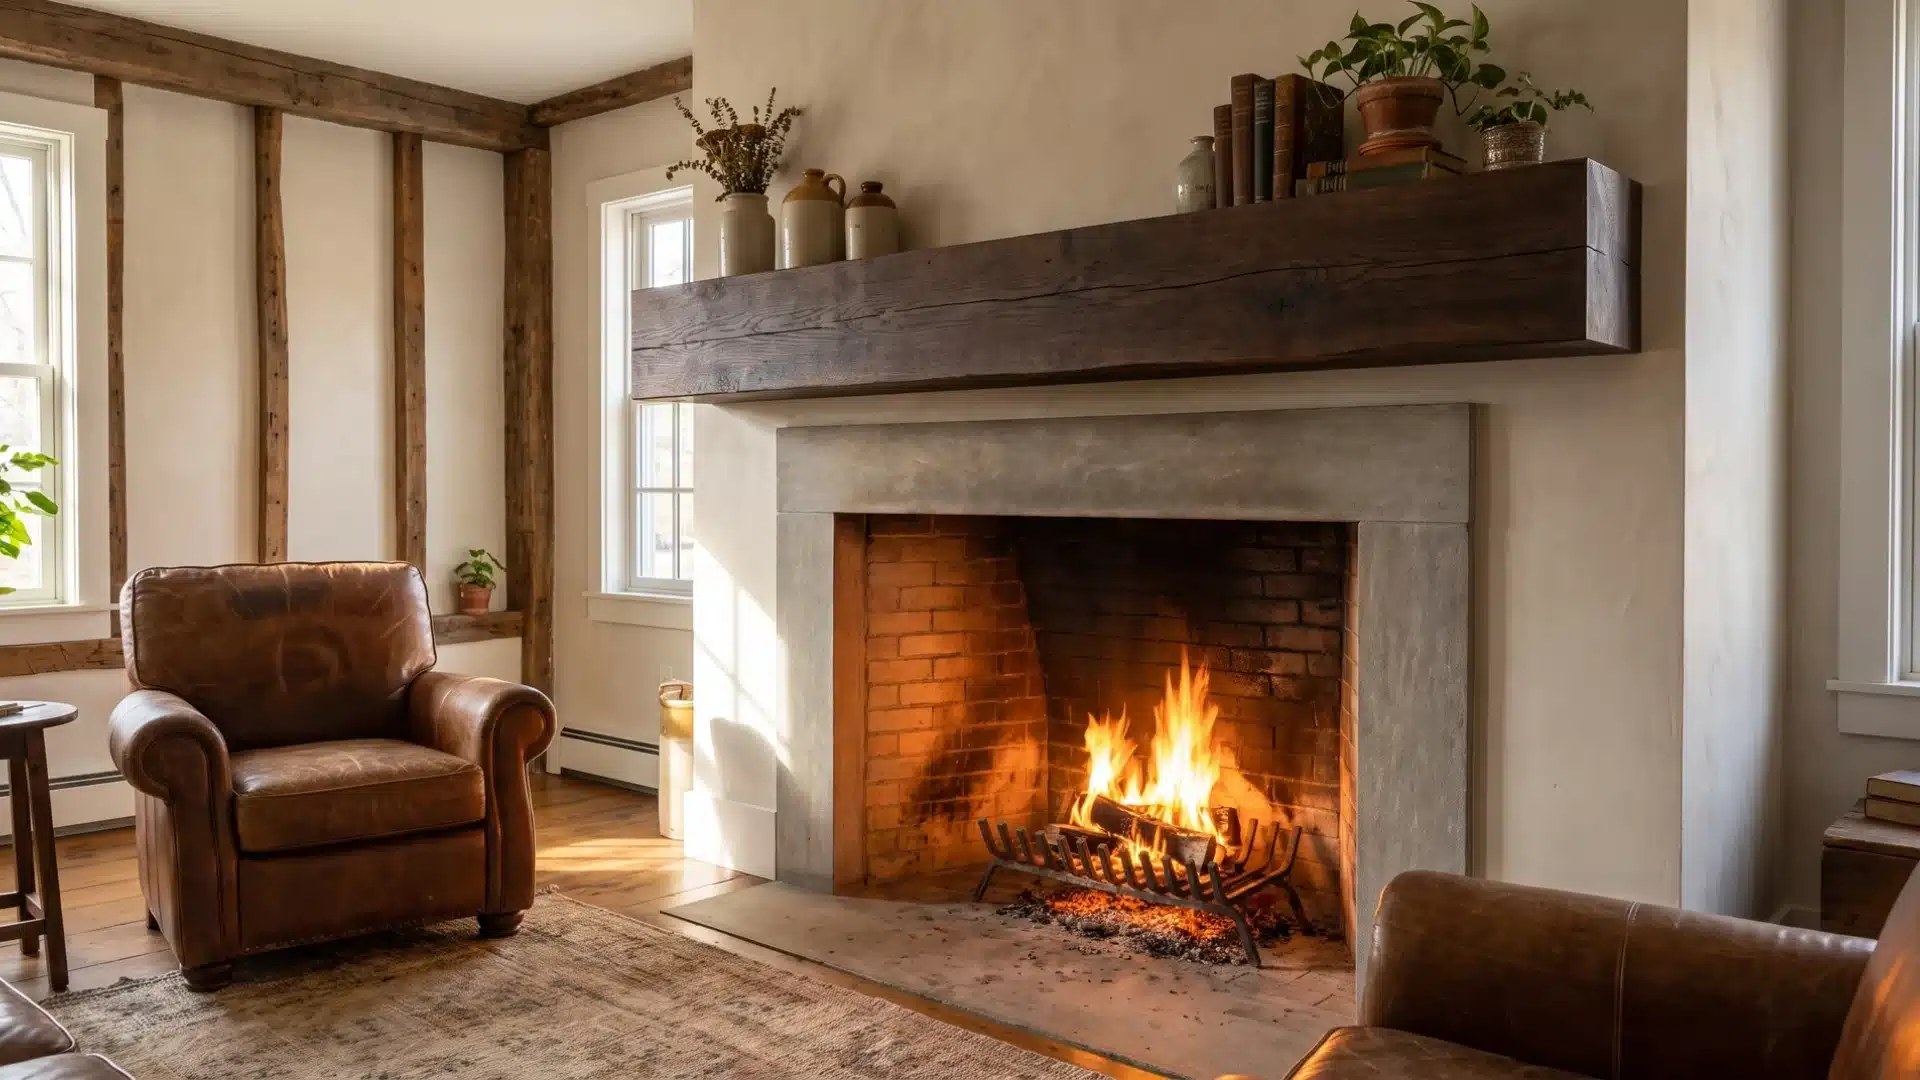
Built like a hollow box using mitered corners, this style mimics the look of a solid wood beam without the heavy weight or cost.
You build four separate pieces, a front, two sides, and a top, then join them with pocket screws and glue so they appear as one solid block from the outside.
This method saves money on lumber since you do not need a full solid beam, and it also makes the mantel much easier to lift and install. Box beam mantels suit farmhouse, industrial, and traditional styles equally well.
3. Leg-Supported Mantel
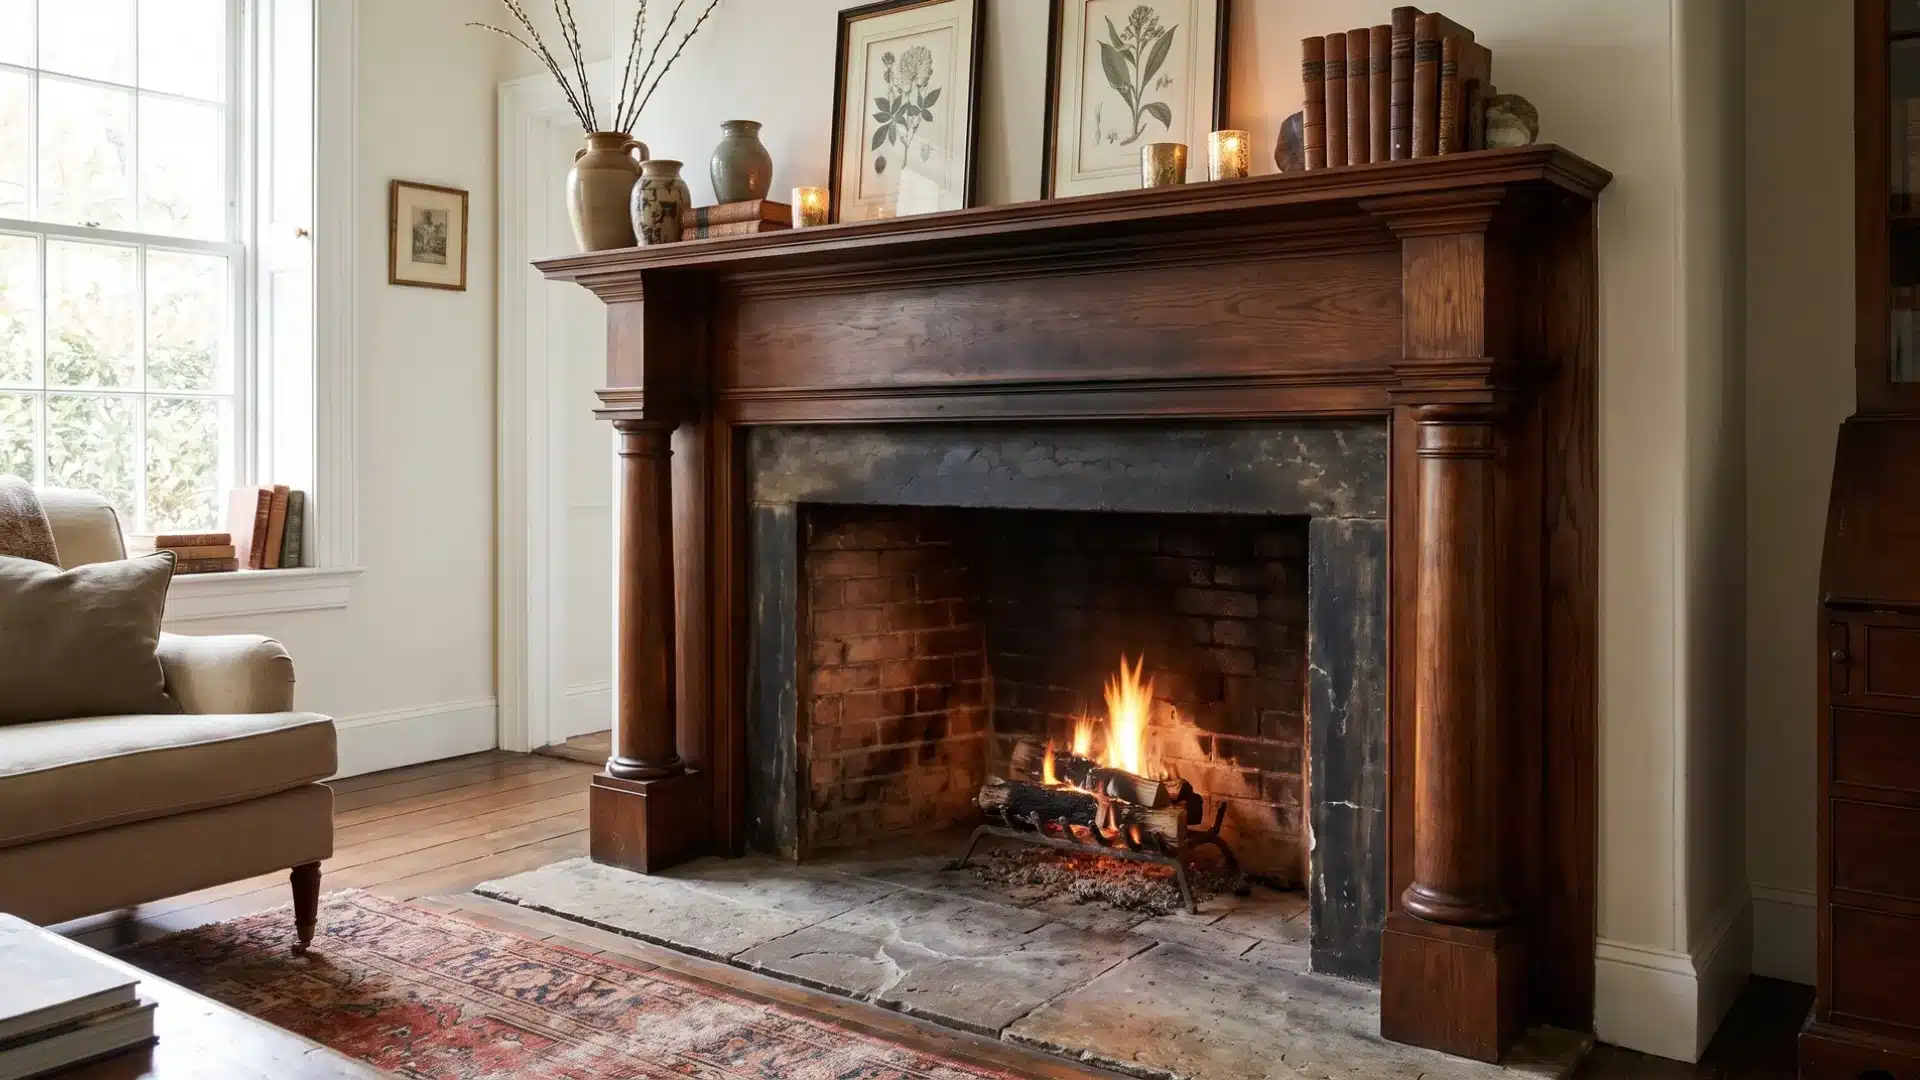
This design uses two vertical pillars or legs that rest on the floor or hearth, with a horizontal shelf connecting them at the top.
It works well for a classic or traditional fireplace surround, especially in older homes with existing brick or stone fireplaces.
Because the legs carry the weight down to the floor instead of the wall, this style does not rely as heavily on wall anchors. You can dress up the legs with trim, molding, or paneling to match existing woodwork in the room.
4. Reclaimed Wood Mantel
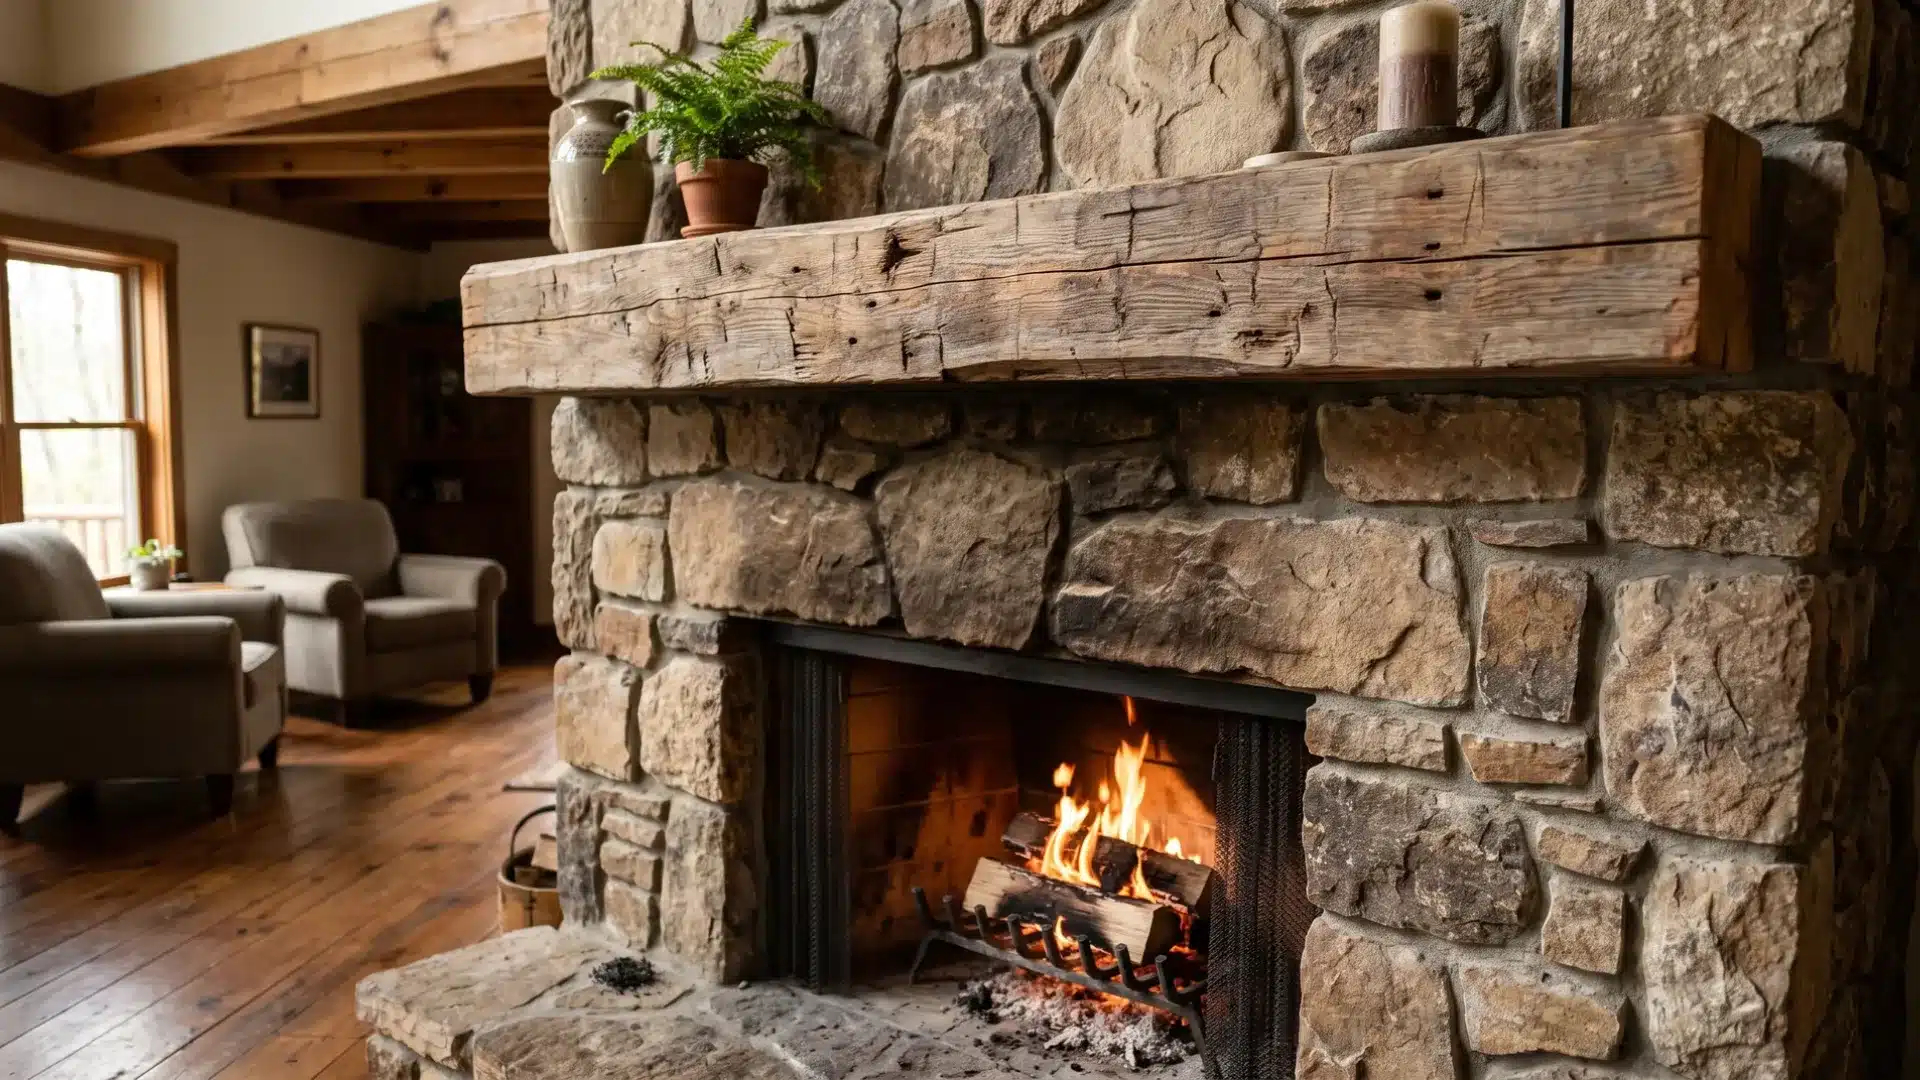
Made from old barn wood, salvaged beams, or textured lumber, this style adds character and a rustic feel with minimal finishing needed.
The natural marks, saw cuts, and color variation in reclaimed wood give each mantel a one-of-a-kind look that new lumber cannot copy.
You will still need to flatten one side and square the edges so the piece fits properly, but you can leave the show side rough for texture.
This type pairs nicely with stone fireplaces, exposed beams, or a cabin-style living room.
5. Faux Mantel for Non-Working Fireplaces
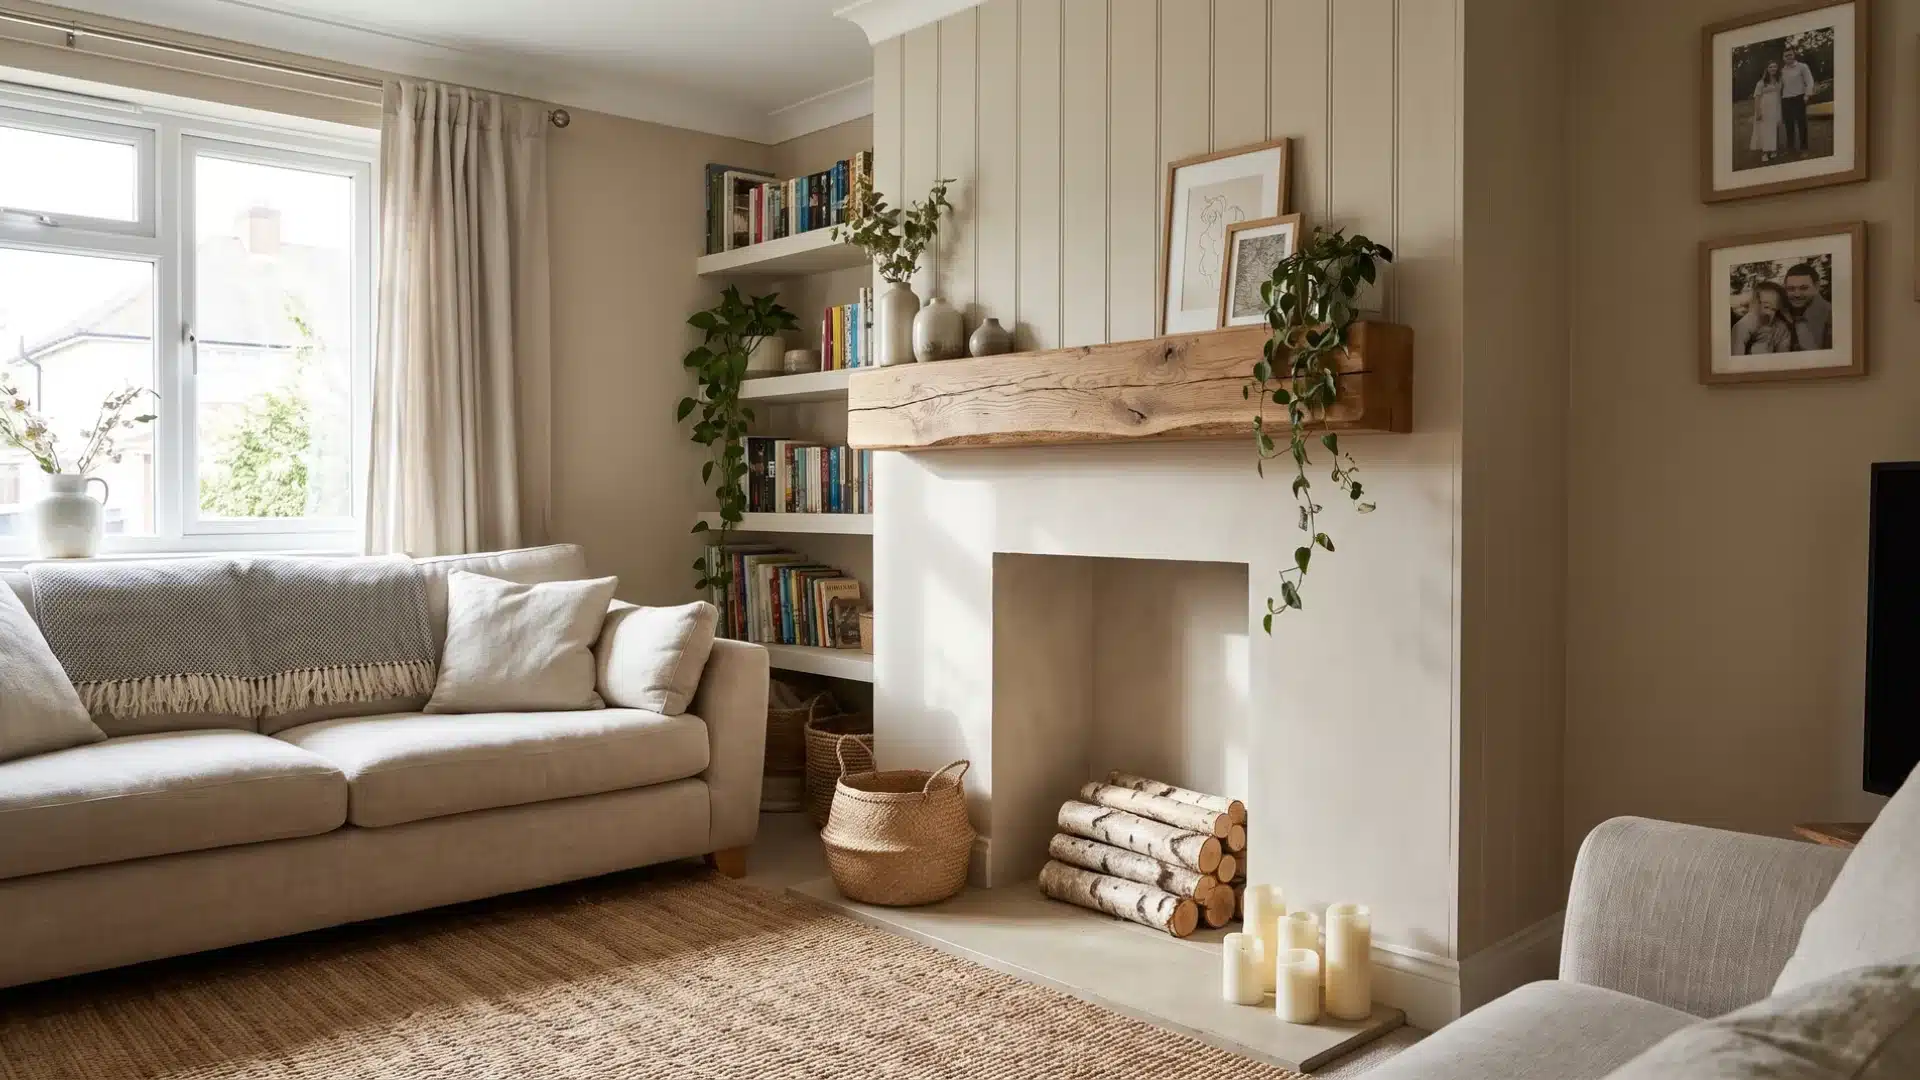
If you do not have a real firebox, this style creates the look of a mantel and surround purely for decor, often paired with an electric insert or open shelving.
Since there is no active flame, you have far more freedom with materials and placement, and you do not need to follow the same strict clearance rules that apply to wood-burning fireplaces.
This option works well in apartments, rental homes, or rooms where you want a cozy focal point without any construction to the wall itself.
Many homeowners use shiplap, trim boards, and a simple wood shelf to complete the look, and the same cozy effect carries outdoors too, where a DIY outdoor fireplace turns a patio into a gathering spot on cool evenings.
How Much Does a DIY Fireplace Mantel Cost?
Costs vary based on materials. Here is a quick breakdown to help you budget your project:
| Mantel Type | Materials Used | Estimated Cost |
|---|---|---|
| Basic mantel | Pine or MDF | $30 to $75 |
| Mid-range mantel | Pine with trim and molding | $75 to $150 |
| Premium mantel | Walnut, oak, or reclaimed wood | $150 to $400 |
| Professional build and install | Custom design, any material | $400 and up |
Common DIY Fireplace Mantel Mistakes to Avoid
One of the most serious mistakes you can make is ignoring clearance codes, since this can create a real fire hazard near your firebox.
Another common error is using the wrong wall anchors. Drywall anchors alone cannot support a heavy wood mantel, no matter how secure they look at first.
Skipping structural support is just as risky. A ledger board into studs or masonry anchors is not optional for anything but the lightest shelf.
Rushing the measuring step causes problems too, since a mantel that is even slightly uneven will be obvious once installed. Taking a little extra time at each stage prevents most of these problems.
Trending in Fireplace Mantel Design
Chunky shelves made from reclaimed or textured wood are having a real moment, bringing more warmth than a plain painted MDF ever could.
Floating mantels are still popular, but the current version leans thicker and more substantial rather than thin and barely there.
Two-tone pairings are showing up often too, like a dark wood shelf against a light stone surround. Fluted detailing along the front face is another look gaining traction.
On the styling side, homeowners are favoring a collected, layered look over matched decor sets lined up in a row.
Frequently Asked Questions
What wood to use for a DIY mantel?
Poplar is a softwood species that’s commonly used for fireplace mantels. It’s easy to paint or finish and is a great choice for rustic mantels.
What do you put in the middle of a fireplace mantel?
The middle of a fireplace mantel is the “anchor” of your display, such as an oversized piece of art, a large decorative mirror, or a wall-mounted television.
How thick should a mantel be for a fireplace?
A standard fireplace mantel usually measures between 5.5 and 7.5 inches thick (the vertical face) and 6 to 12 inches deep.
Conclusion
Building your own fireplace mantel is a rewarding weekend project that transforms your living room without a big budget.
You now know how to measure, choose the right mounting method, and follow the clearance rules that keep your home safe.
Take your time with each step, from cutting to finishing, and check your local code before you install anything near an active firebox.
Pick a wall mounting method that matches your wall type, and never skip the safety math on projection and distance.
With the right planning and a bit of patience, your DIY fireplace mantel will become the feature everyone notices the moment they walk into the room.