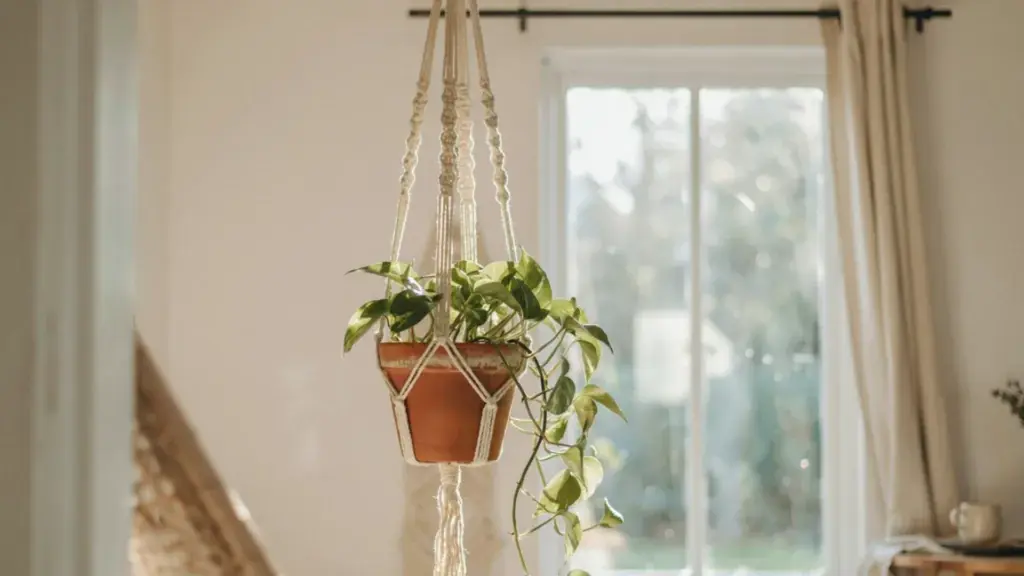
I’ve hung plants from every ceiling in my 70-plant Portland apartment, and I still get asked the same question.
How do you make a diy plant hanger that looks good and doesn’t fall? I get it.
Cord length, knot tension, and the hardware you use to mount it matter more than which knot pattern you pick.
This covers a full DIY macrame plant hanger from start to finish: the materials, the knots, how much cord to buy, and how to mount it so it stays on the ceiling.
No guesswork, just what works in my own apartment.
What You Need for a DIY Plant Hanger
Before you cut anything, gather your supplies.
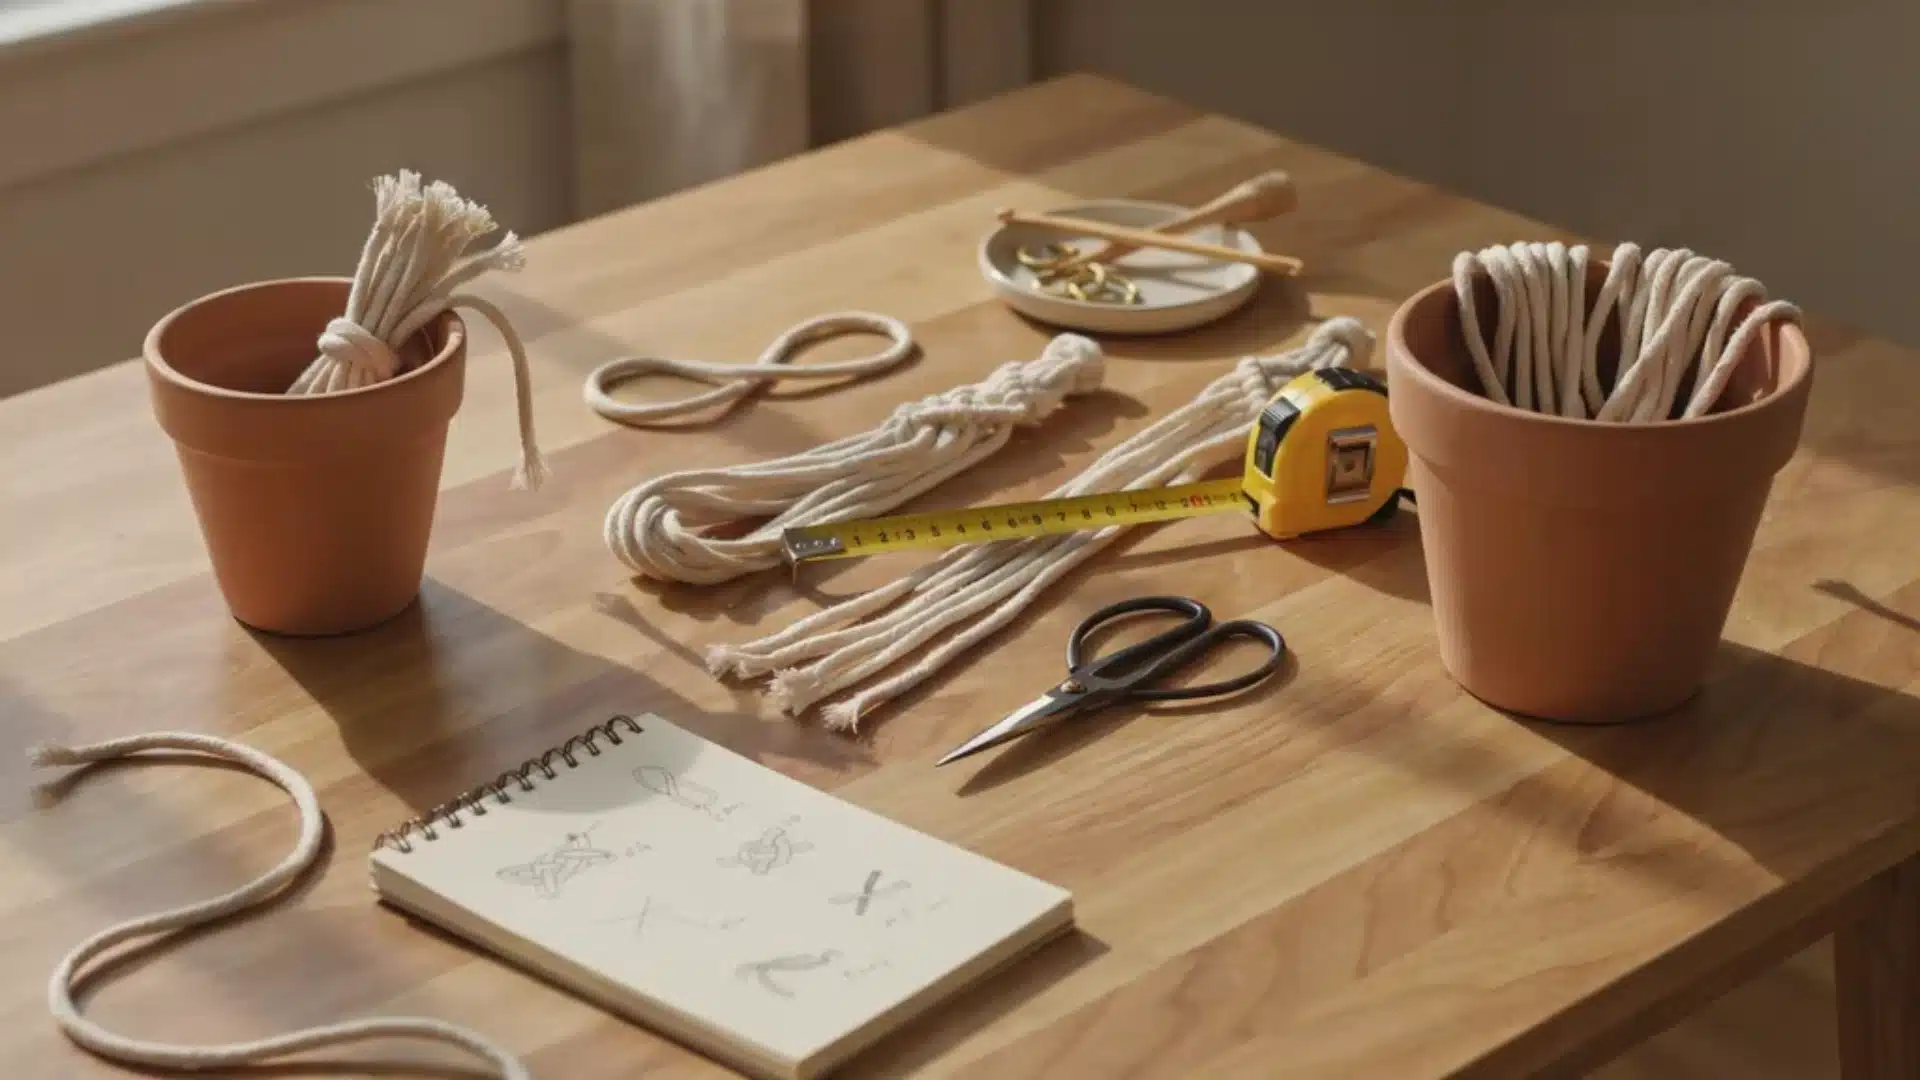
For a diy macrame plant hanger, you want cotton cord between 3mm and 5mm thick.
A thinner cord suits small pots and looks delicate on a shelf or window. A thicker cord holds heavier pots without looking bulky, though it uses more material overall.
Not every houseplant does well suspended in a hanger, either. It’s worth checking which trailing plants for hanging pots hold up best before you tie a single knot.
You will also need:
- A metal ring or wooden ring, or you can skip it and start with a folded loop
- Sharp scissors
- A tape measure
- Tape to keep cord ends from fraying while you work
- An S hook so you can hang the piece while you knot it
Jute and hemp work too, and both hold knots well. But cotton is softer on your hands and easier to knot evenly over a long session.
How Much Cord to Cut for The Hanger
Nothing is more annoying than having to redo half your work because one strand came up short.
A simple rule: cut your cord four to six times the finished length you want.
So, for a 3-foot hanger, cut each strand to 12-18 feet. A small pot around 4 inches wide usually needs about 6 strands, each 10 feet long.
A larger pot, closer to 8 inches wide, works better with eight strands, each 14 feet long. Denser knots use more cord, and loose, open patterns use less.
I always cut a little extra, usually a foot or two per strand. Trimming leftover cord takes seconds. Starting over does not.
Step by Step: Tying Your DIY Macrame Plant Hanger
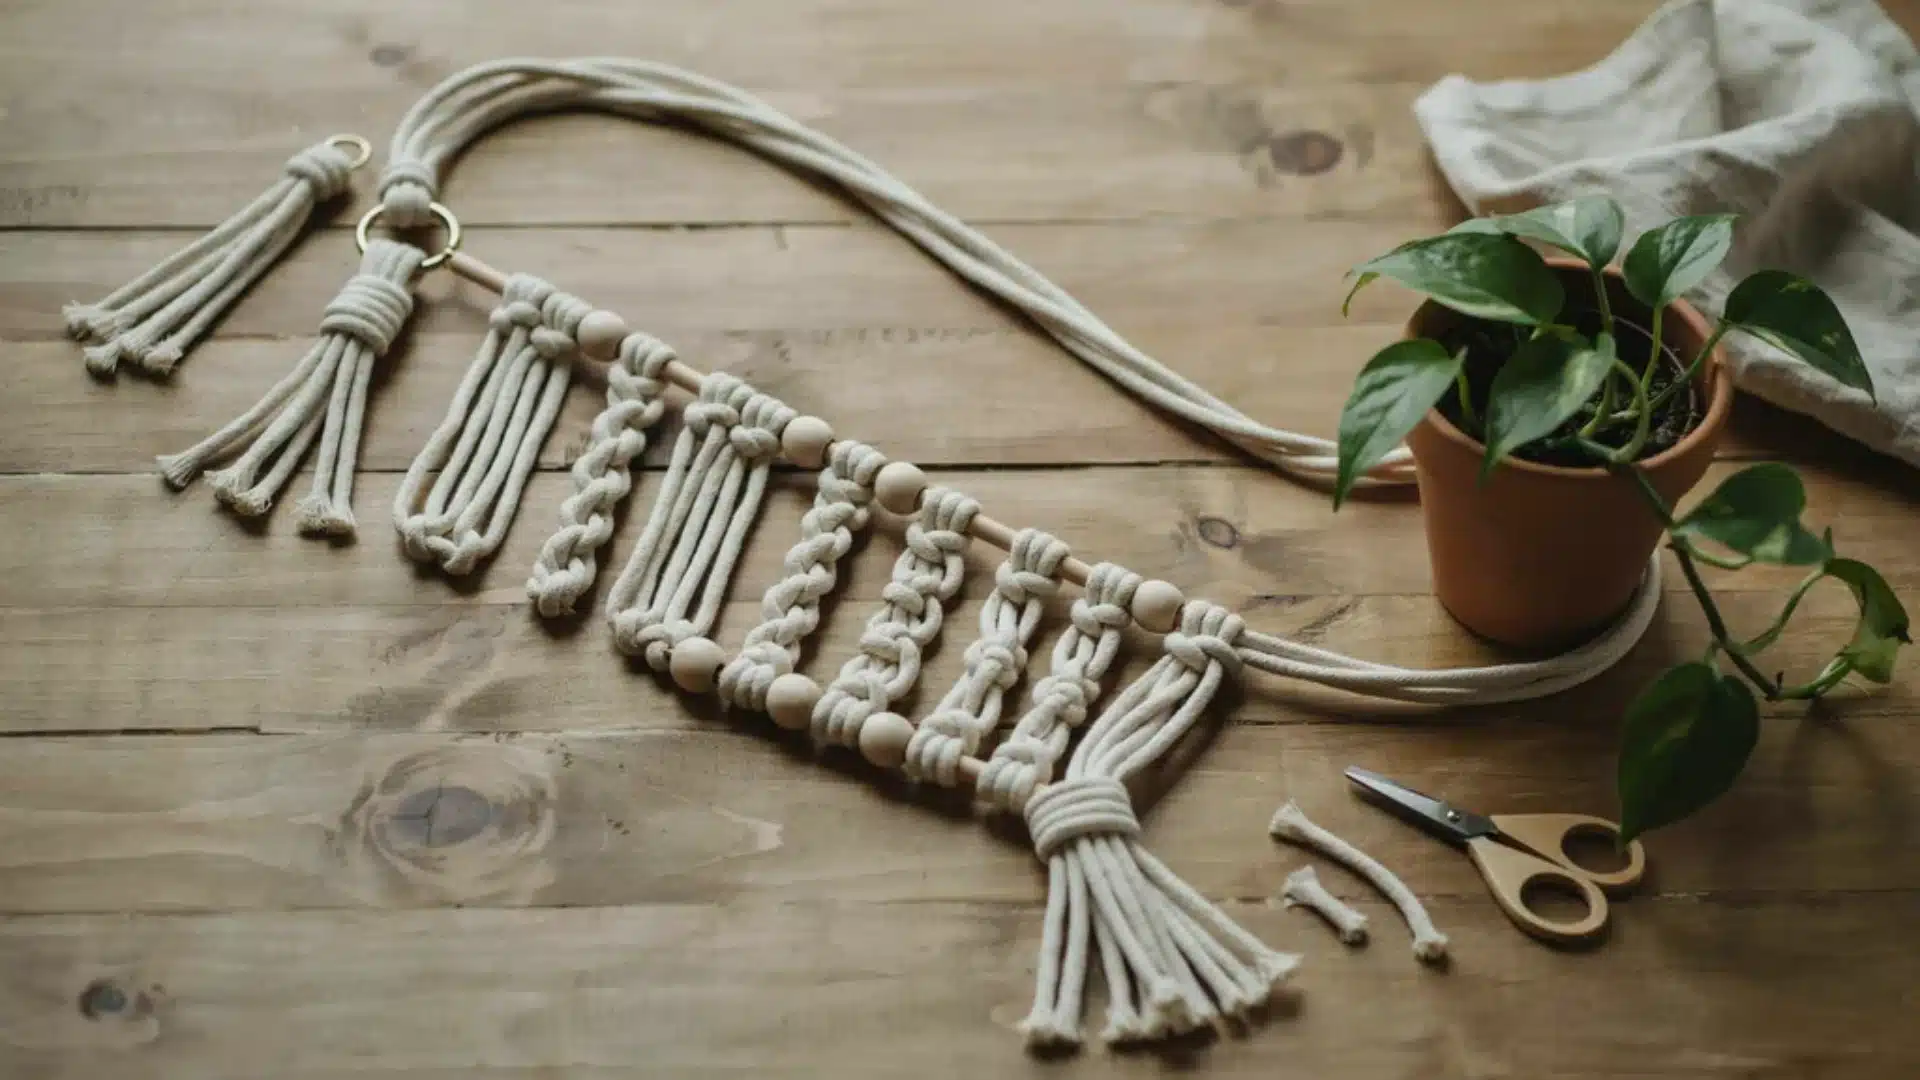
Once your cord is cut, here’s how I put mine together.
Step 1: Fold each strand in half and loop it through your ring using a lark’s head knot.
Step 2: Gather all the strands about two inches below the ring and wrap a short piece of cord around them tightly. This is your gathering knot, which holds the entire top section together.
Step 3: Split the strands into four groups of four.
Step 4: Tie a spiral knot, also called a half-square knot, down each group for about 4 inches. Keep the tension even so the spiral twists in the same direction throughout.
Step 5: Leave a gap of three to four inches with no knots, then tie a square knot by connecting two strands from one group with two strands from the next group. Repeat this all the way around.
Step 6: Add a second row of connecting knots a few inches lower to form the basket shape that will cradle your pot.
Step 7: Gather all the strands again near the bottom and tie a final wrap knot to close the base.
Step 8: Trim the ends evenly, or leave them longer if you want a fringed look at the bottom.
Set your pot inside before you trim anything. It’s much easier to adjust the fit while the cord is still loose than after you have cut the fringe.
Simple Knots You Should Know for DIY Hanger
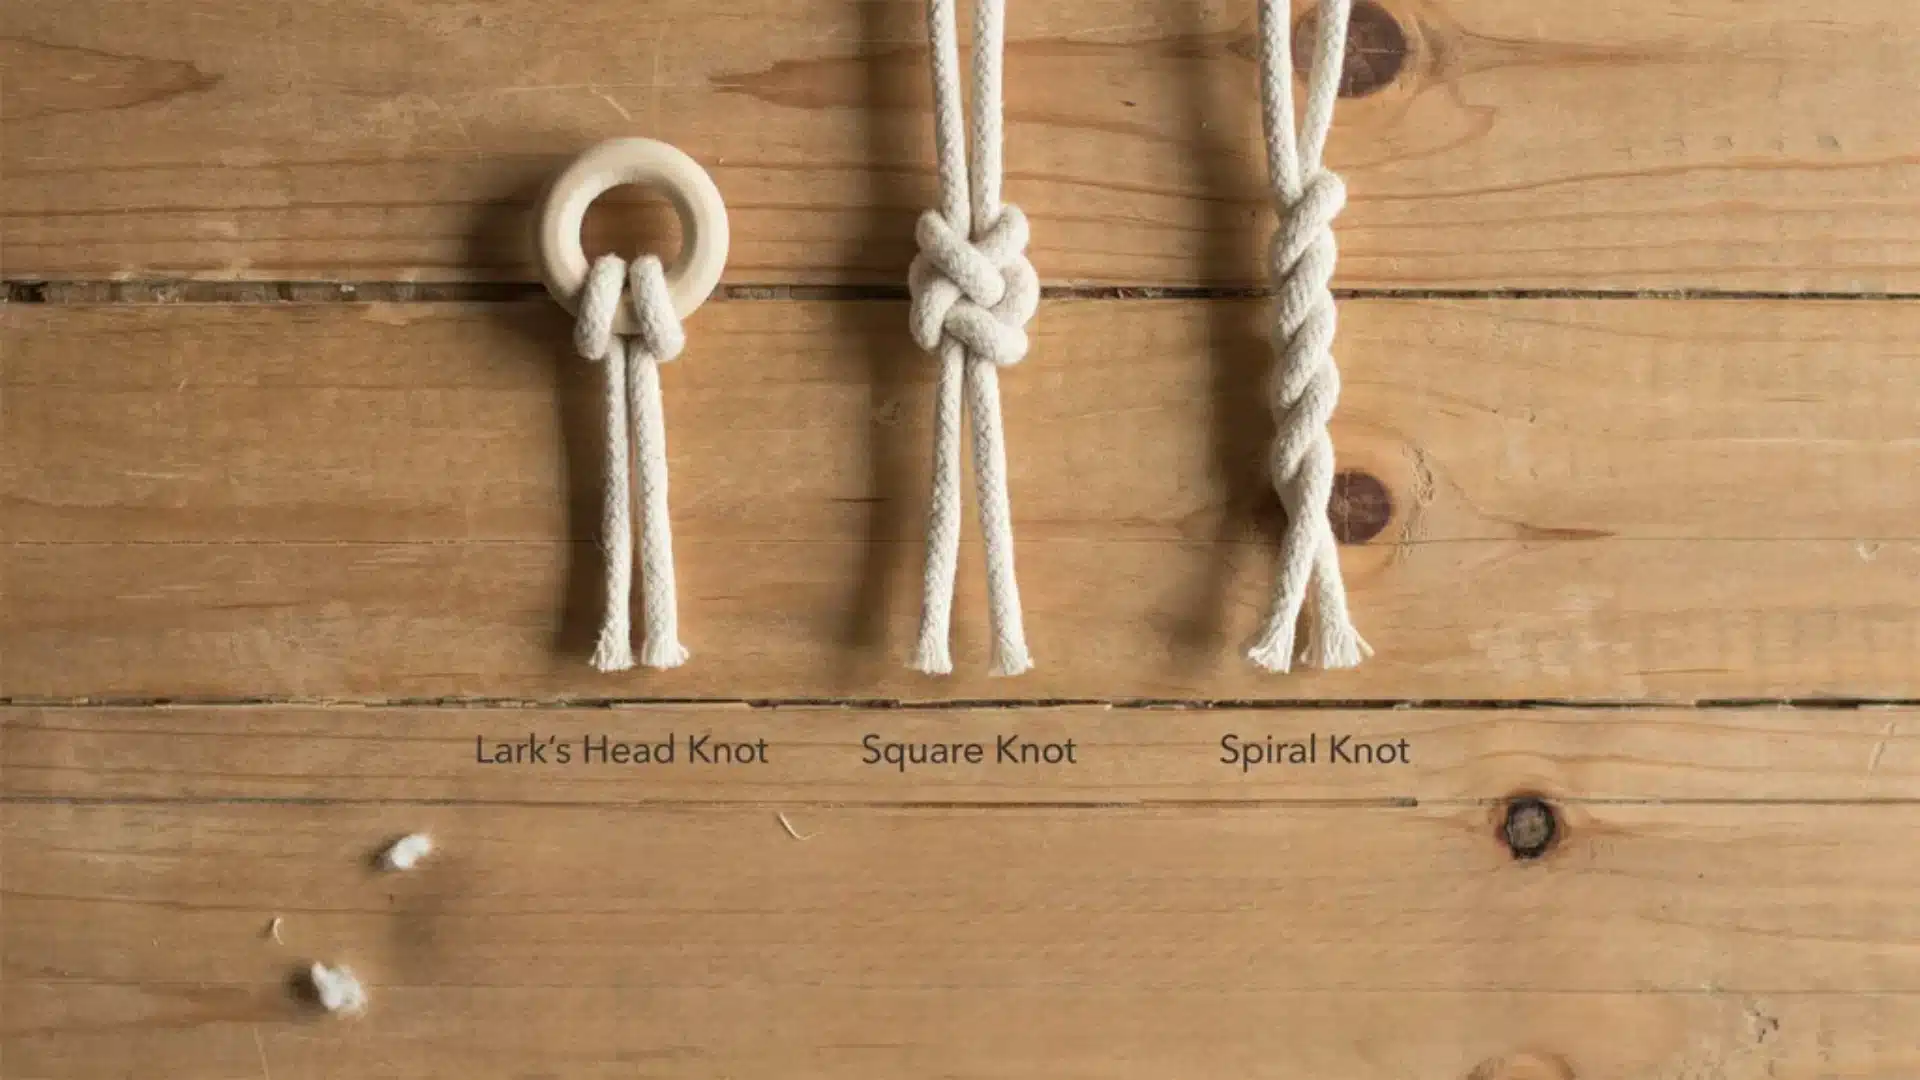
You only need three knots for most plant hangers, and once you know them, patterns online stop looking confusing.
- The lark’s head knot attaches your cord to the ring at the very start.
- The square knot creates the woven sections lower down that actually hold the pot in place.
- The spiral knot, which is really a repeated half square knot, twists on its own once you tie a few in a row without changing direction.
Practice each knot on a scrap piece of cord first. It takes ten minutes and saves you from redoing the first row of your real hanger.
Not a Macrame Person? Try This Instead
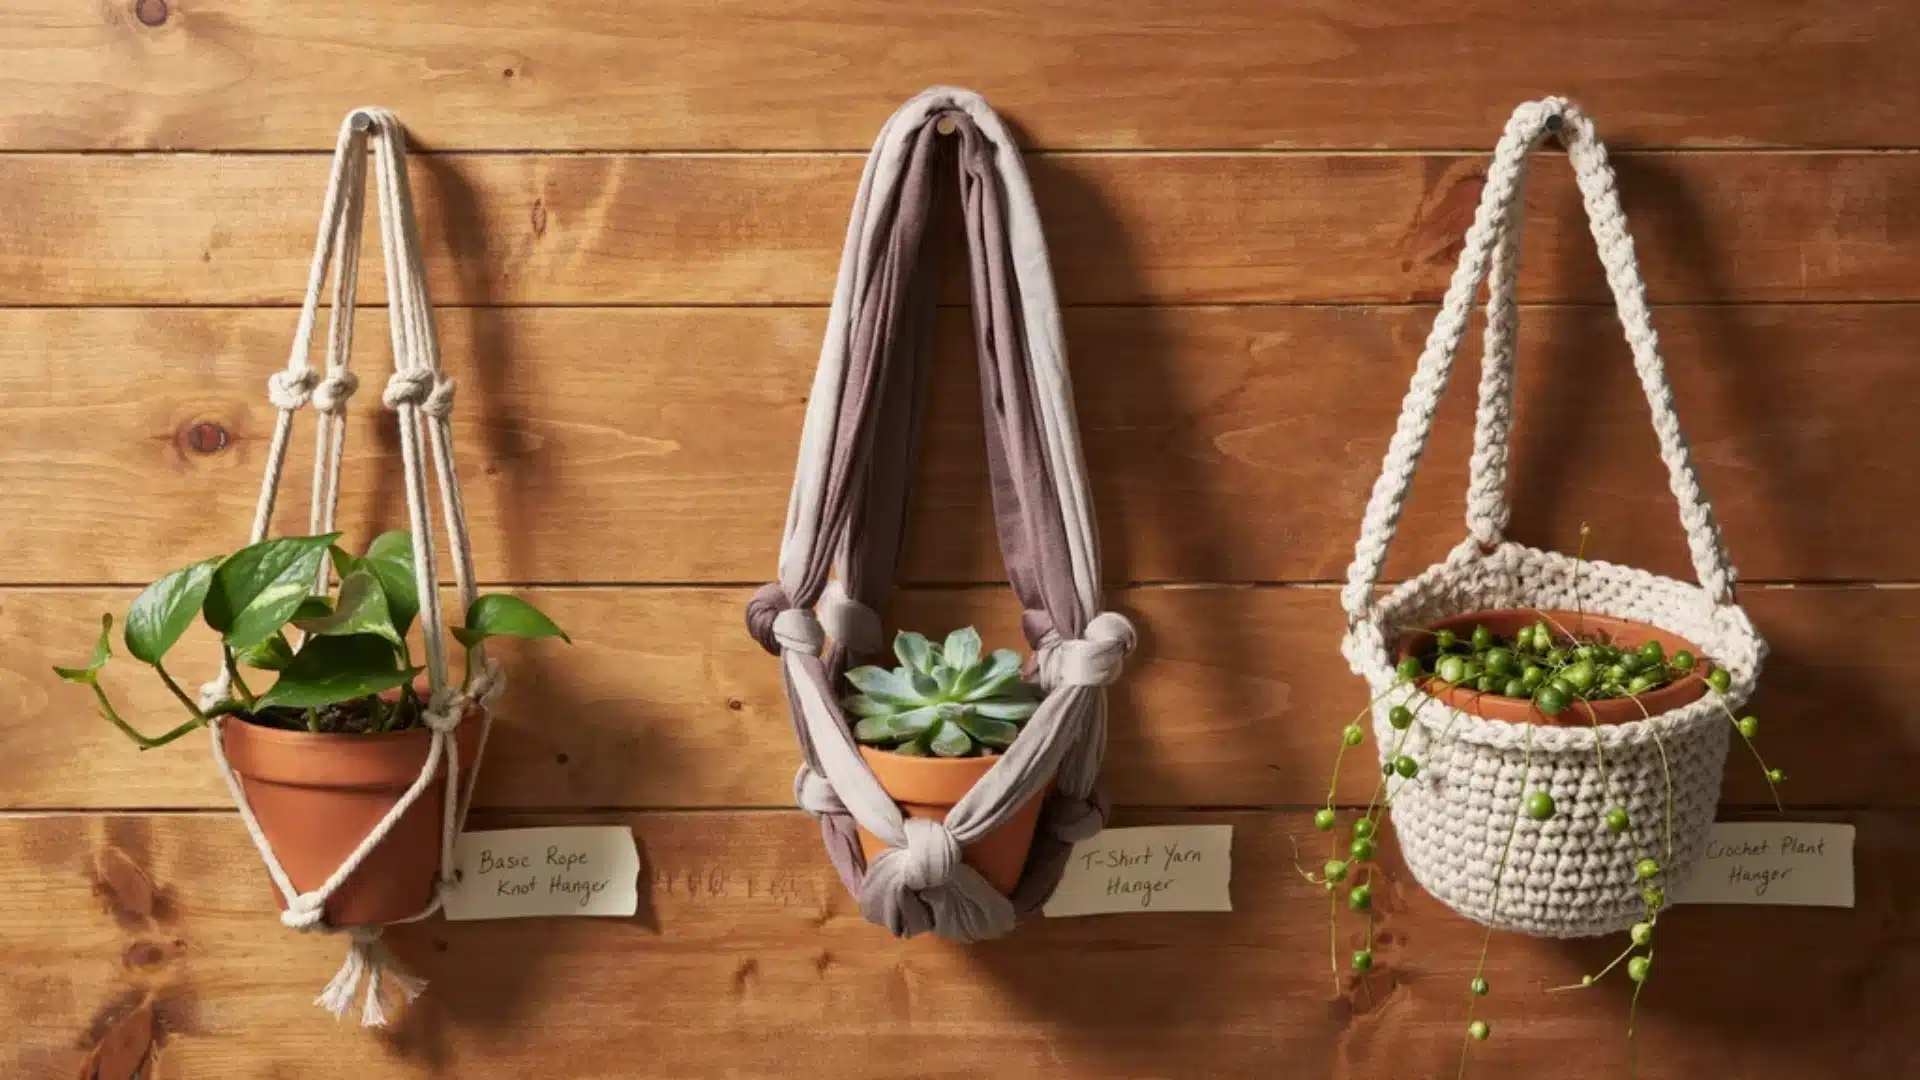
If knots aren’t your thing, you don’t have to give up on a homemade hanger. A basic rope version uses only overhand knots.
Cut six cords, tie them together at the top through a hook or handle, then knot pairs of cords together at set intervals to form the basket shape. No macrame terms needed at all.
T-shirt yarn works the same way if you have old shirts to cut into strips instead of buying cord. It’s soft, stretchy, and free.
If you already know how to crochet, a crochet version can hold a pot with just chain stitches and single-crochet rows worked in the round.
It takes less time than learning new knots from scratch, and the finished look has a completely different texture than macrame.
How to Hang It Without Wrecking Your Ceiling
This part matters more than the knots. A small pot with damp soil can weigh 10 pounds. A larger one can weigh 20 pounds or more once you water it.
Find a ceiling joist with a stud finder if you can. A hook screwed straight into a joist holds the most weight and is the safest option for anything over 15 pounds.
If you’re stuck with drywall between joists, use a toggle bolt rated for at least 25 pounds rather than a plastic anchor.
Never rely on an adhesive hook for anything heavier than a small succulent. Those usually hold about a pound, sometimes less.
This covers what this one hanger needs. For a full rundown of hook types, ceiling materials, and weight ratings for your entire space, see how to mount plants safely on any ceiling.
Water your plant once it’s hanging, then check the hook again after a week. Cord stretches slightly during the first few days, and it’s much easier to fix a loose hook early than to deal with a fall later.
DIY Plant Hanger Mistakes to Avoid
I’ve made every one of these mistakes at least once, so save yourself the redo.
1. Cutting the cord too short: I cut my first cord too short and had to start the whole piece over. Now I always add a foot or two extra per strand before I start.
2. Using a weak anchor for a heavy pot: I used a plastic anchor for a pot that was clearly too heavy for it, and watched it slowly pull loose over about a month before I caught it. A toggle bolt would have saved me the mess.
3. Skipping a test knot: I used to jump straight into the real hanger without practicing the spiral knot on a scrap piece first. My top row always came out looser than the rest because I hadn’t found my rhythm yet.
4. Choosing a cord that was too thin: I once used a thin string on a larger pot, and it stretched out of shape within a week. A thicker cord holds its structure much longer under real weight.
5. Trimming the fringe too early: I trimmed my cord ends before setting the pot inside, and the fit ended up crooked. Now I always place the pot first and trim last.
6. Leaving cord ends untaped: I skipped taping the ends while I worked, and the cord frayed right where I needed clean strands for knotting. A small piece of tape at each end saves a lot of frustration later.
Now I size up on cord length and hanging hardware every time. It costs a little more upfront and saves a mess on the floor later.
Your First DIY Plant Hanger
Making your own diy plant hanger isn’t complicated once you know the order of steps.
Cut enough cord, learn three knots, and mount it somewhere that can actually hold the weight. That’s really all a diy macrame plant hanger needs to turn out well.
I still make new versions for every room I rearrange, and each one gets a little faster than the last.
If you’re starting, keep your first pot light and your knots loose. You can always tighten your technique on the next one. Give it a try this weekend, and let your plant find its new spot in the sun.
Frequently Asked Questions
How Much Cord Do I Need for a Plant Hanger?
Cut each strand four to six times the finished hanger length. A 3-foot hanger needs strands around 12 to 18 feet long, depending on knot density.
What’s the Best Cord for a Macrame Plant Hanger?
Cotton, 3mm to 5mm thick. It’s softer on your hands than jute or hemp and easier to knot evenly over a long project.
Can I make a plant hanger without learning macrame?
Yes. A rope version using only overhand knots, or a crochet version using chain and single-crochet stitches, both skip macrame entirely.
How much weight can a ceiling hook hold?
A hook in a joist handles the most weight, safe for anything over 15 pounds. In drywall alone, use a toggle bolt rated for at least 25 pounds.